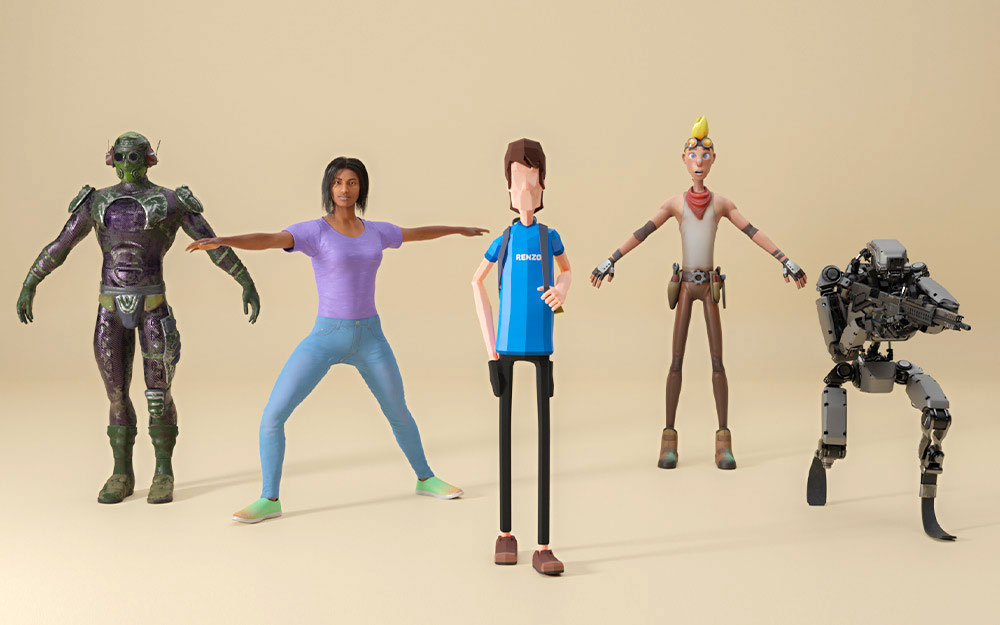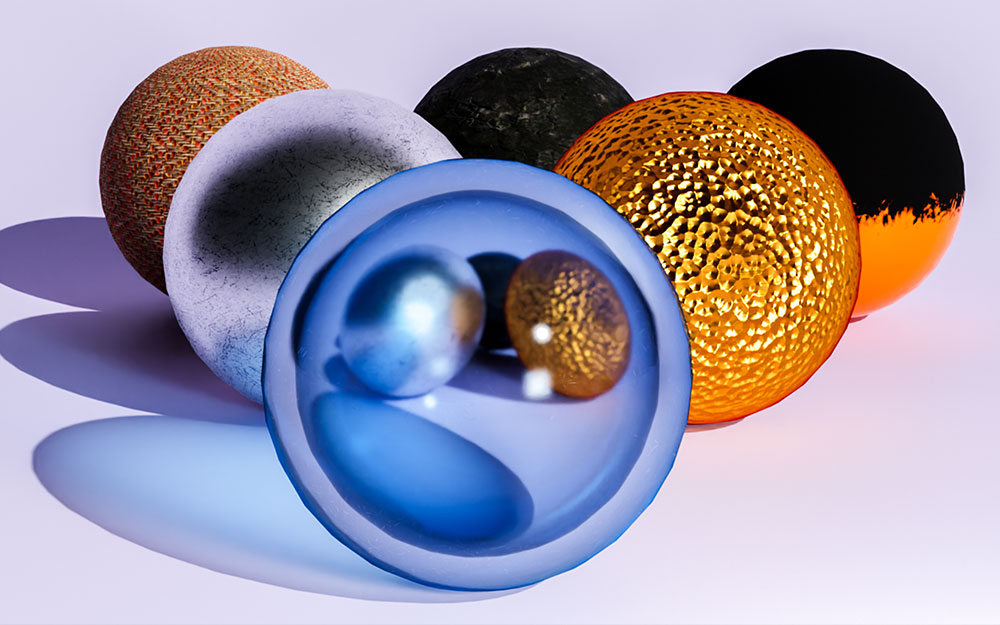
Introduction
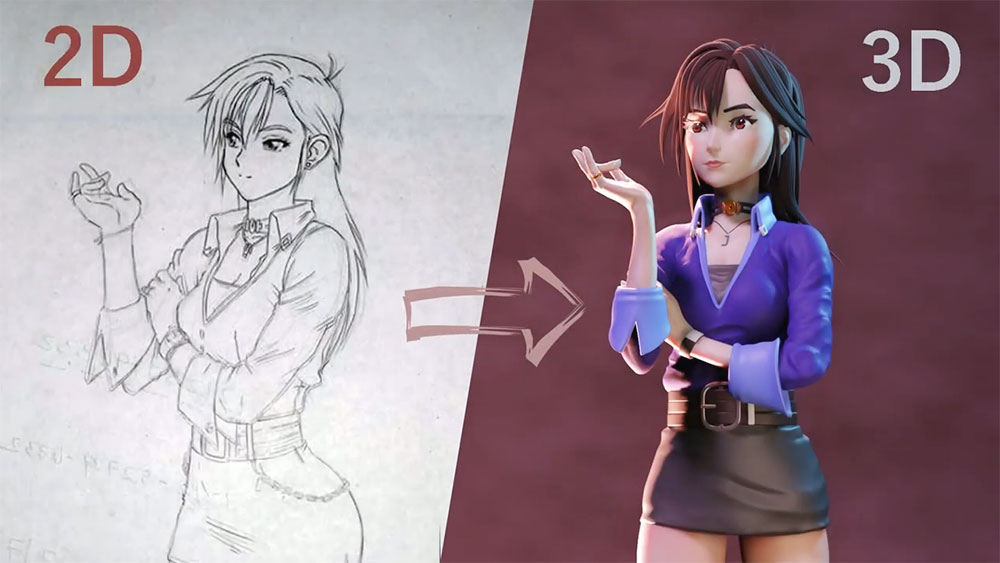
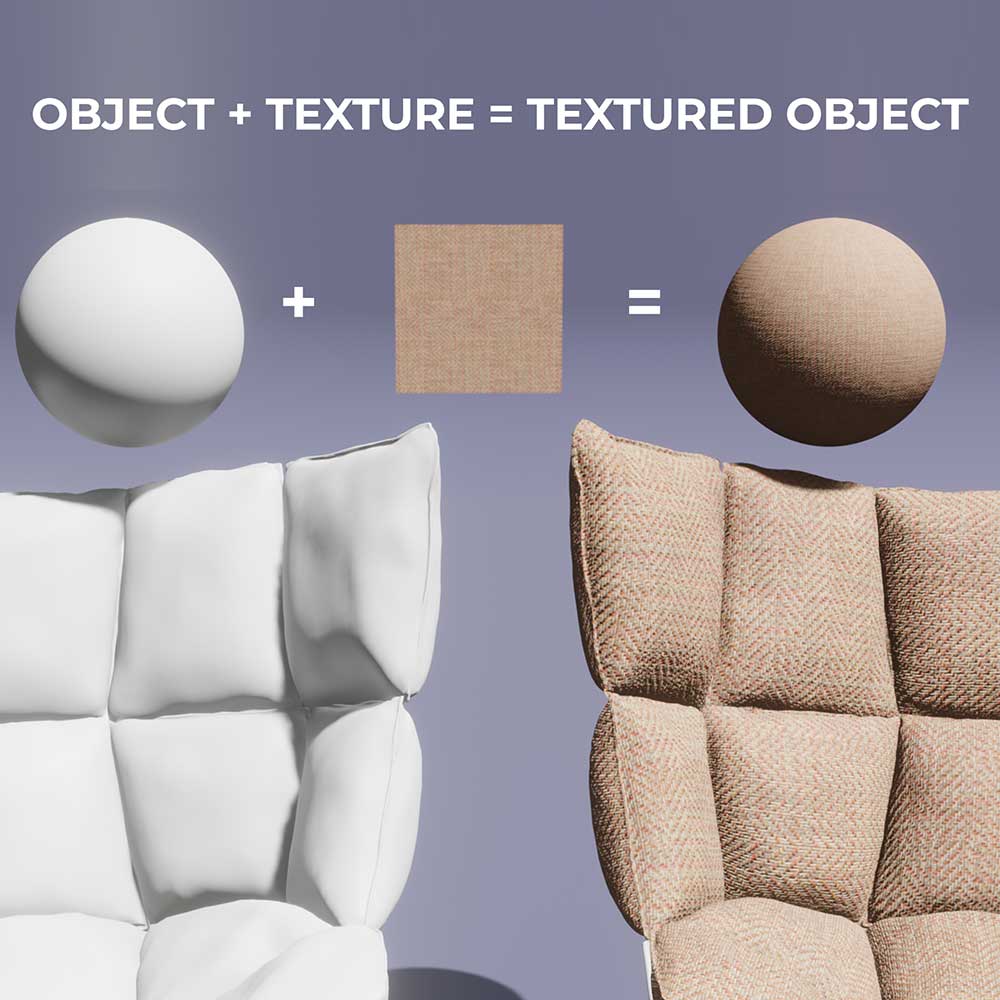
The texture map is a final piece of a puzzle you just can’t do without when creating a model. Same as none of the 3D visualization or 3D modeling services would be able to provide outstanding results if it wasn’t for the variety of texture maps.
They are used to create special effects, repeating textures, patterns, and fine details like hair, skin, etc. If you have complete mesh and a UV map, simply applying texture to it won’t yield the results.
You need texture maps to define the color, shininess, glow, transparency, and many other qualities of your 3D model. And these are just a few of them.
We’re going to get you familiar with the most common types of texture maps in 3D modeling and their categories.
But first things first.
What is Texture Mapping?
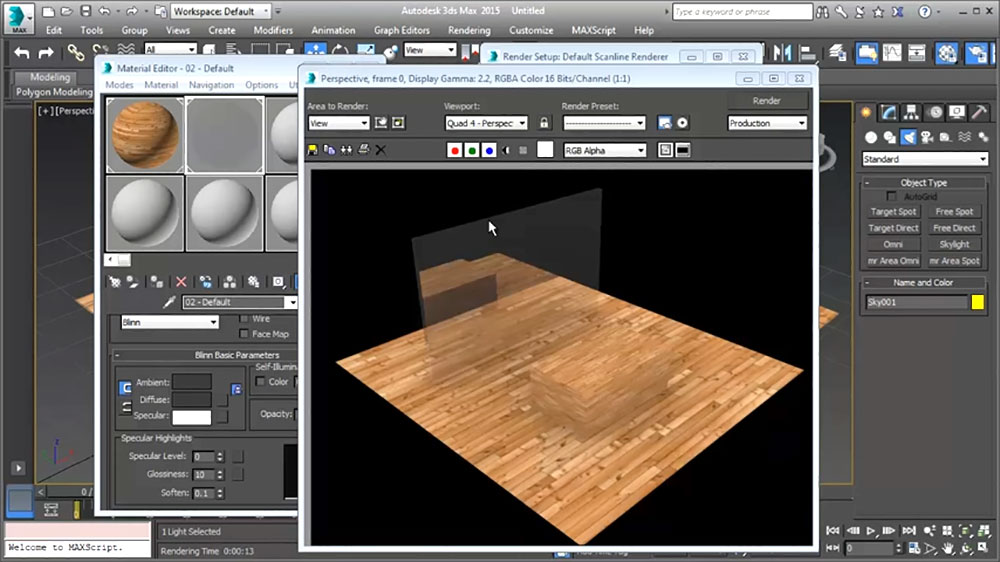
Texture mapping, in its essence, means applying a 2D image onto the surface of 3D objects, known as UV mapping, so the computer can generate that data on the object during rendering.
Simply put: texture mapping is like wrapping an image around the object to map the pixels of the texture to the 3D surface.
It significantly reduces the number of polygons and lightning calculations required to create a sophisticated 3D scene.
PBR vs Non-PBR Modeling
You start working with texture long before you even finish your mesh since you always have to keep it in mind. The software you create a model for determines what texture maps you will use to add details.
There are texture maps for PBR or non-PBR materials. Both provide photorealistic textures, but one is a good fit for game engines and the other for marketing and promotional purposes.
PBR is an abbreviation for physical-based rendering that uses accurate lighting to achieve photorealistic textures. Though it appeared in the 1980s, it’s become a standard for all materials now.
The best 3D modeling software to use PBR are Unity, Unreal Engine 4, Painter, Substance, and upcoming Blender v2.8.
Non-PBR, on the contrary, also accounts for stunning photorealistic results, but at a much higher price. You need to use a lot more maps and settings to get these results even with the flexibility of the textures.
Maya, 3ds Max, and Modo are the most common applications that use non-PBR texture maps.
With that said, if you create your 3D models for a game engine, you’d better go with the PBR textures. Still, if you pursue promotional purposes, you’ll be just fine rendering a model with non-PBR texture.
Pro tip: either way, you have to UV unwrap your model so the texture is mapped onto your model the way you intend it to, regardless of the texture type used.
PBR Texture Maps
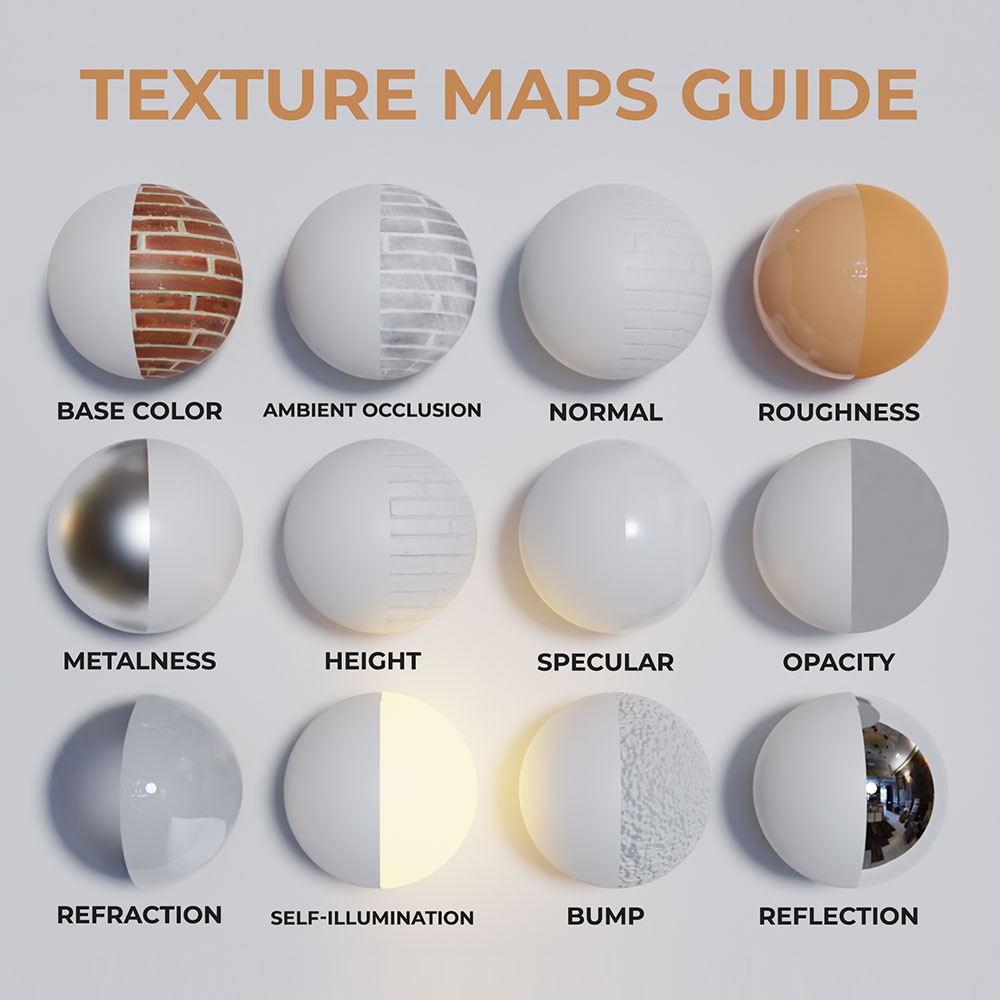
Now, since the PBR is becoming more standardized and offers more variety of texture maps, we’ll start with them.
As stated before, having a 2D image you want to place onto your 3D model is not enough to get the result. You use multiple texture maps to tweak different options to add richness and subtlety to your model. So, each map is responsible for different effects.
There are the following texture maps:
1. Albedo
Albedo texture maps are one of the most basic maps you use in your model since they define its basic color with no shadows or glare. Regarding this, they can be a flat light image of the pattern you want to apply to your object or a single color.
Note: to avoid inconsistency in your 3D model, make sure the lighting is flat. The lightning may be different from the source image. It only creates unnecessary shadows.
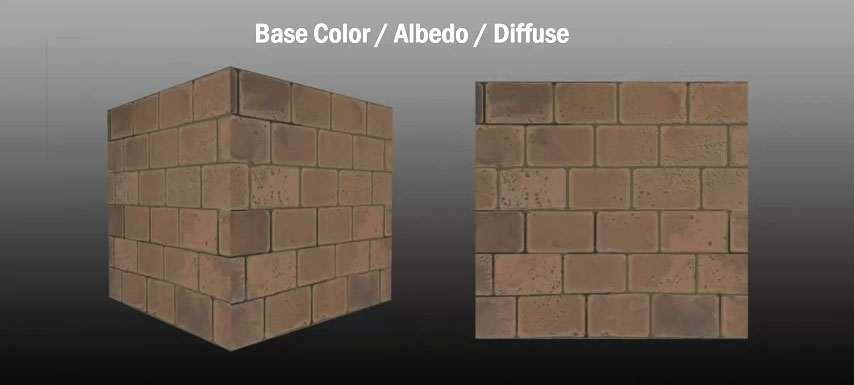
Besides, they are often used to shade reflected light, especially in metal textures.
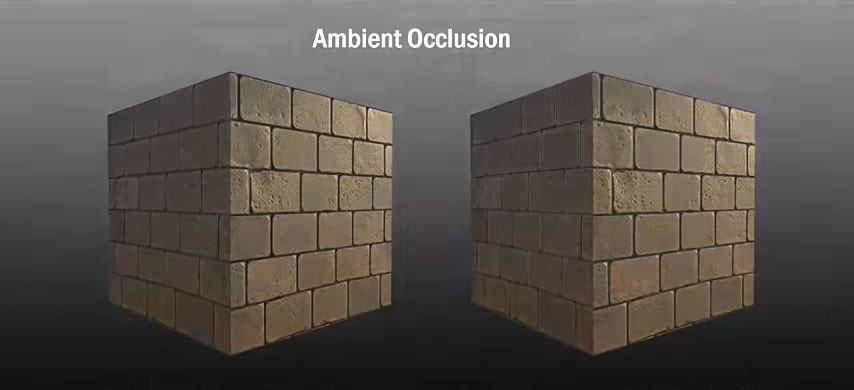
2. Ambient occlusion
Map scale: Gray 一 black denotes shadowed areas and white 一 the most lit areas.
If you’re looking for something opposite to Albedo maps but can’t find the name for it 一 it’s ambient occlusion map often referred to as AO. AO texture maps are usually combined with the albedo by the PBR engine to define how it reacts to light.
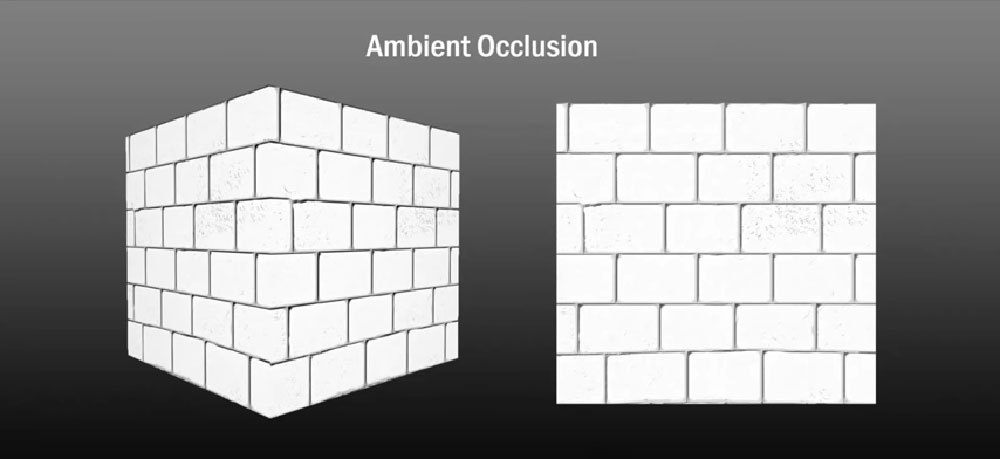
It is used to improve the realism of the object by simulating the shadows generated by the environment. So, shadows are not solid black, but more realistic and softer, especially at places that get less light.
3. Normal
Map scale: RGB values 一 green, red, and blue that correspond to X, Y, and Z axis.
In normal maps, RGB values (green, red, and blue) are used to create bumps and cracks in your model to add more depth to the polygon mesh. The R, G, and B dictate the X, Y, and Z axis of the base mesh in three directions to ensure better accuracy.
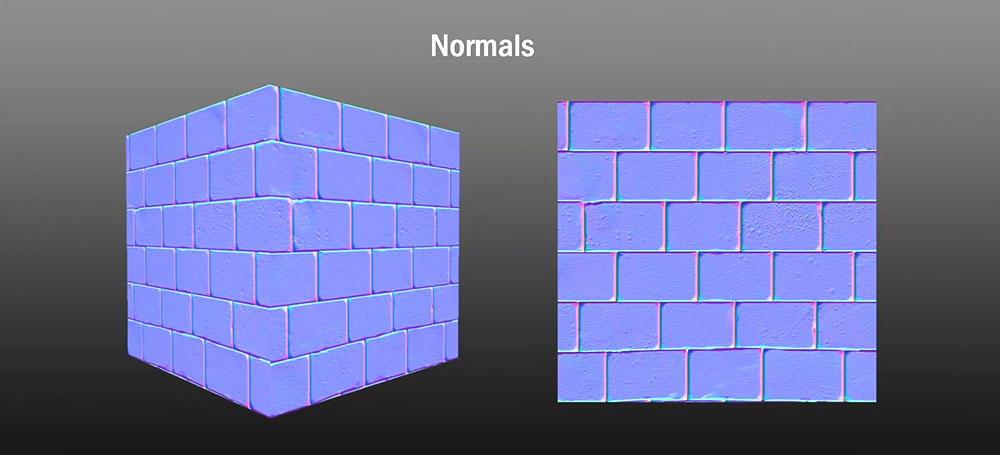
Moreover, it is important to note that normal maps don’t change the base geometry of an object. They just use complex calculations to fake the dents or bumps with the light effects.
Note: since there is a lot of light used in a normal map, you should hide the seams of your object better, unless you want them to be clearly seen.
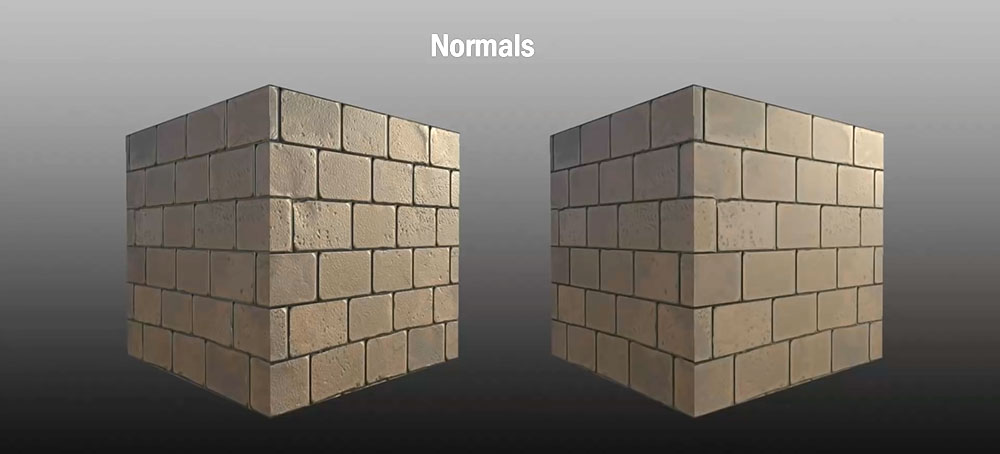
With such an approach these bumps are not visible past a certain viewing point, especially if they are exaggerated. However, it allows keeping the polygon count low while getting a real object.
So, it’s a win-win.
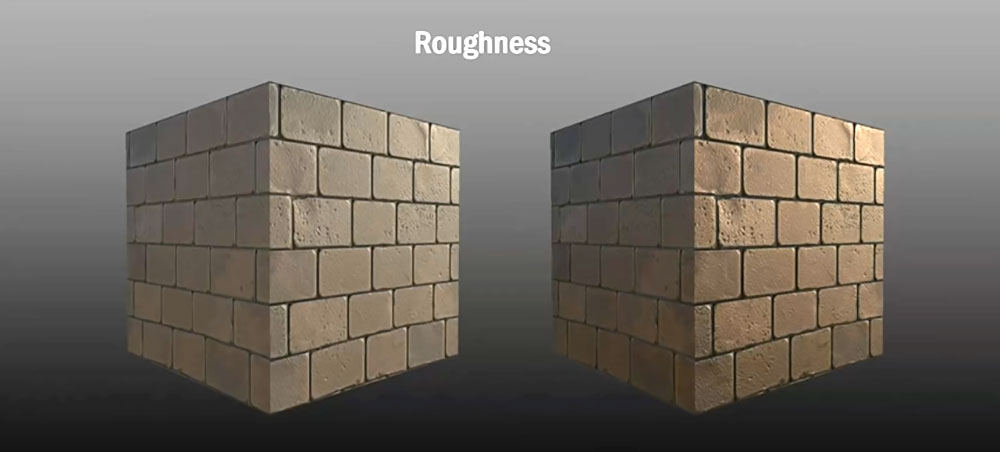
4. Roughness
Map scale: Gray 一 black represents the maximum roughness, white 一 smooth surface.
A roughness or glossiness texture map is a self-explanatory map. So, it defines how smooth your model is, depending on how light reflects off it. This map is vital since different objects have different levels of roughness. Like, the light won’t be scattered across a mirror and rubber in the same way.
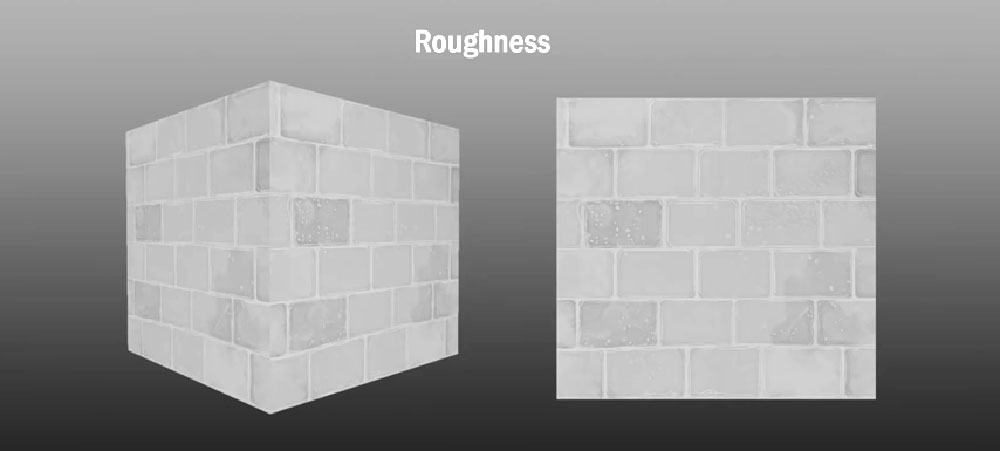
So to reflect it in your model in the best possible way you have to tweak the roughness value. If it’s zero, the model won’t scatter light at all. The lightning and reflections will be brighter in this case.
On the other hand, if it’s full, your material will get much more light scattered around. However, the lighting and reflection will appear dimmer.
5. Metalness
Map scale: Gray 一 black denotes non-metallic, white 一 fully metallic.
This one’s fairly easy to guess. This texture map defines whether an object is made of metal. Metal reflects light differently than other materials, so it can make a difference to the final look of your object. It easily simulates the real material and is closely tied with the albedo map.
Though metal maps are grayscale, it is recommended to use only black and white values.
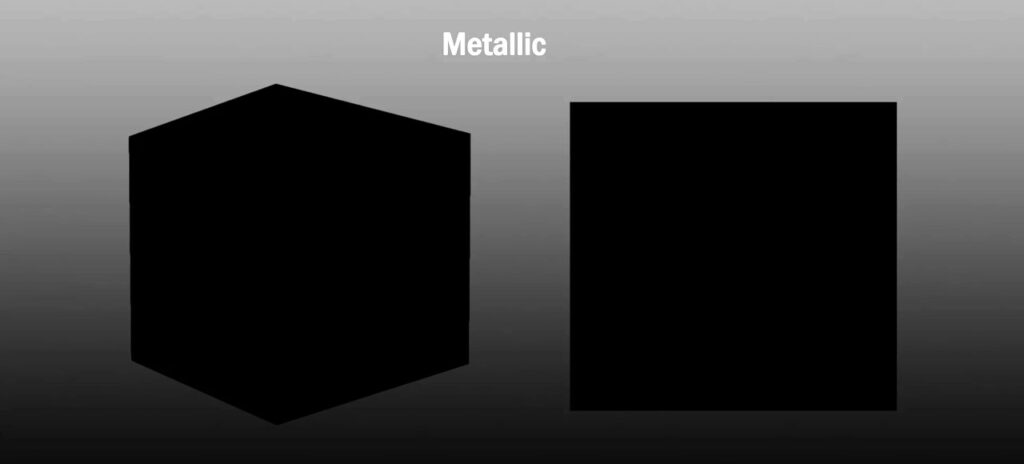
Black, in this case, represents that part of the map using albedo map as the diffuse color and white 一 to define the brightness and color of the reflections and set black as the diffuse color for materials.
The reflections provide the details and color for the materials, so the diffuse color is not relevant in this case.
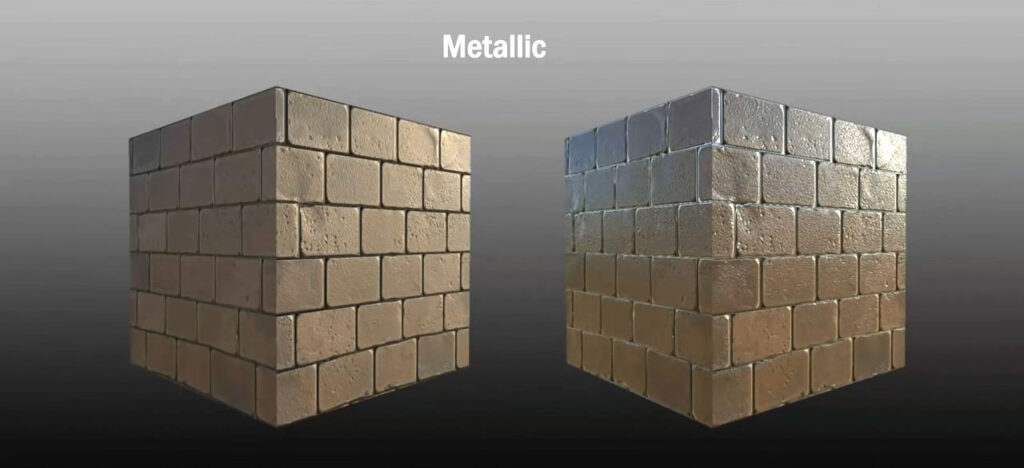
Overall, metal maps provide great value, but being tied with albedo maps sets some limitations for using them.
6. Height
Map scale: Gray 一 black represents the bottom of the mesh, white 一 the peak.
To take one step further from the normal texture map, you have to use height maps. They give you the best details that look equally good at all angles and different lighting.
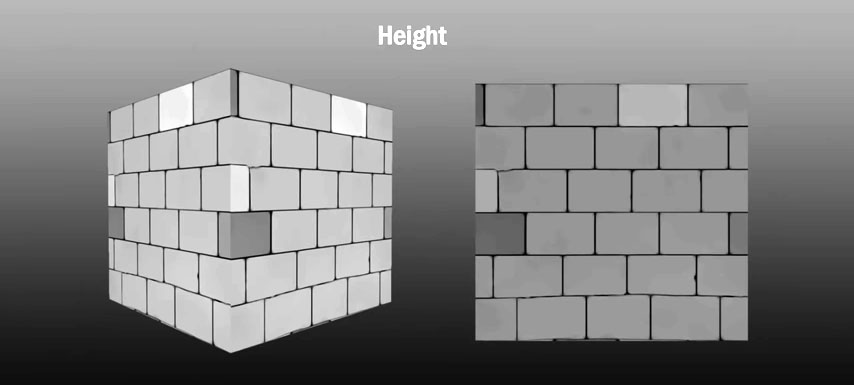
Height maps are considered resource-intensive. Instead of faking the dents and bumps they actually modify the geometry of your model. Adding small details to the mesh doesn’t seem like a big deal until you realize that finer details come at a price.
Pro tip: if you want to use height texture maps on the web, it’s best to bake them when exporting a 3D model.
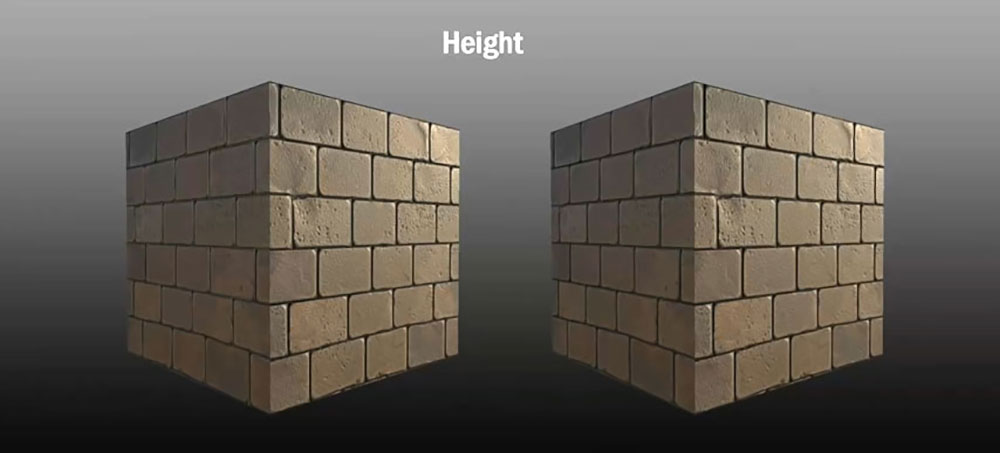
Height maps increase the polygon count of an object. It might be fine for high poly modeling, but still, these maps slow down the rendering time. That’s why it is only used by high-end game engines, while others prefer normal maps.
7. Specular
Map scale: full RGB 一 green, red and blue (metallic left out of albedo).
The alternative to the metalness map is the specular map that provides the same effect if not better. This texture map is responsible for the color and amount of light reflected by the object. It is important if you want to create shadows and reflections on non-metallic materials.
In PBR textures, specular ones affect how your albedo is rendered out of the desired texture and can use full RGB color for that.
Let’s say you want to create a brass material with the metal map. In this case, you just paint that section of your map a brass color in the albedo. The material will appear brass.
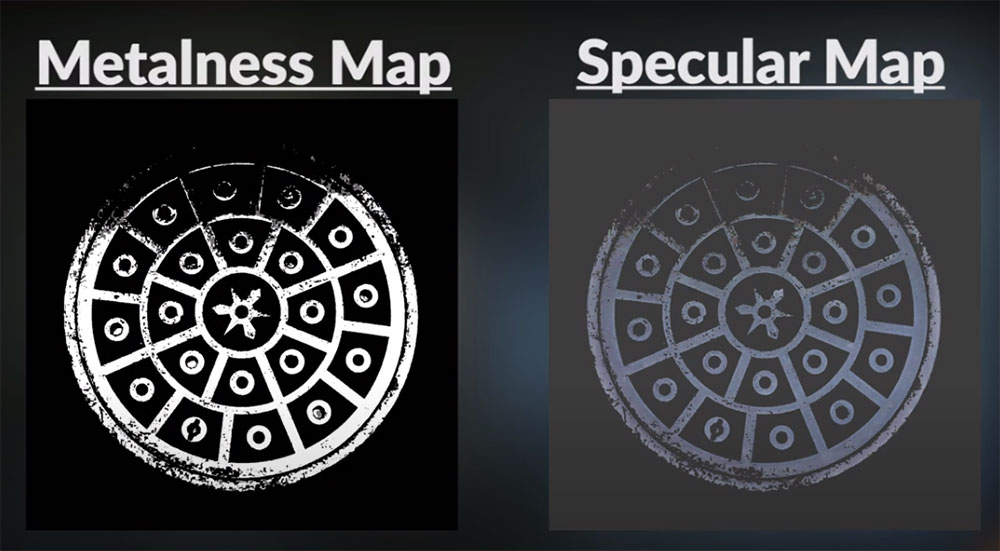
Instead, if you use a specular map the brass section of the albedo will be black. Here you will need to paint the brass details onto the specular map. The result will be the same 一 material will appear brass.
Though you get more flexibility with specular maps, the process adds more complexity to this method.
So, it’s up to you which one to use 一 metalness or specular.
8. Opacity
Map scale: Gray 一 black defines transparent, white 一 opaque.
Since metal, wood, and plastic are not the only materials you use in your models, it is important to know about the opacity texture map. It allows you to make certain parts of your model transparent, especially if you’re creating glass elements or tree branches.
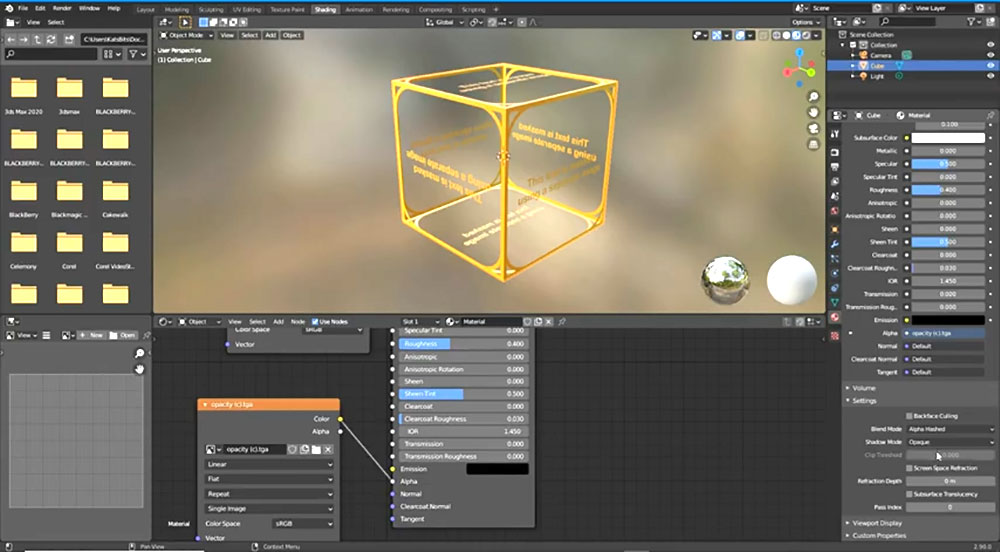
However, if your object is solid glass or made from other translucent material, it’s better to use the constant value of 0.0 being opaque and 1.0. 一 transparent.
9. Refraction
Map scale: constant value.
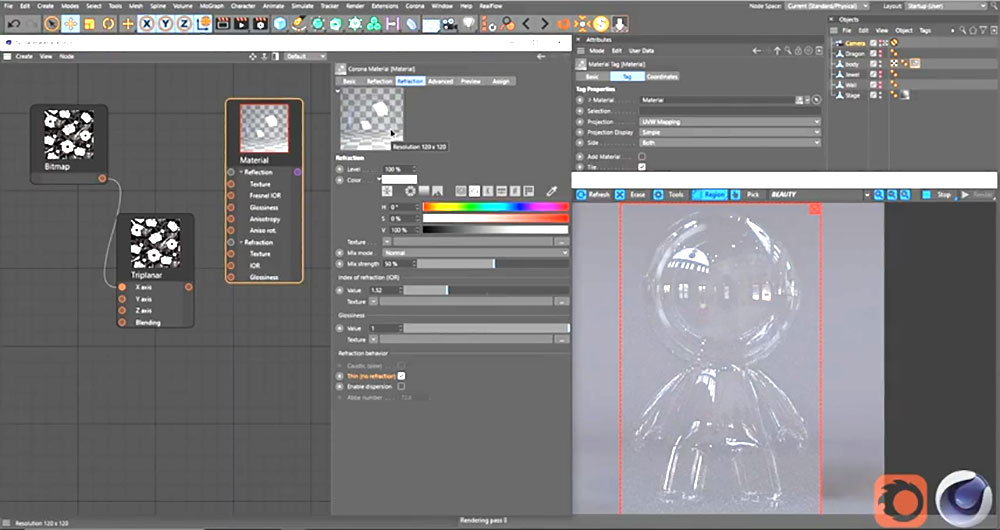
The material of an object defines how the light reflects off it. The light correspondingly affects whether an object looks real enough. It is especially important for certain surfaces like glass and water since they affect the speed of the light that travels through them.
So, the light bends when it passes through gas or liquid which is called refraction. That is why certain things look distorted when viewed through a transparent object. Refraction contributes to that in real life and refraction texture maps help to replicate it in 3D space.
10. Self-illumination
Map scale: full RGB.
Same as the object can reflect the “external” light it can emit some light to be seen in dark areas as well. That’s where the last full PBR texture map 一 self-illumination or emissive color map 一 comes into play.
It is used to create some LED buttons or simulate the light shining from buildings. Basically, it is like an albedo map, but for light.
Pro tip: while you can light an entire scene with the self-illumination map, it can wash realism off your 3D model. It’s better to use conventional lighting in this case.
(Image-2 Texture Maps Guide)
Non-PBR Texture Maps
Since non-PBR texture maps are not standardized or used through a variety of 3D modeling software, there are quite a few to cover.
Diffuse
Diffuse maps are equivalent to the albedo maps. They not only define the basic color of your object but are used by the software to shade the reflected light. That’s actually what differs the diffuse map from albedo.
Diffuse maps aren’t made with flat light and use shadow information to tint surrounding objects with color. You’d hardly notice it, but it will make your 3D object more realistic.
Bump
Map scale: Gray 一 black indicated the lowest point of geometry, white 一 the highest.
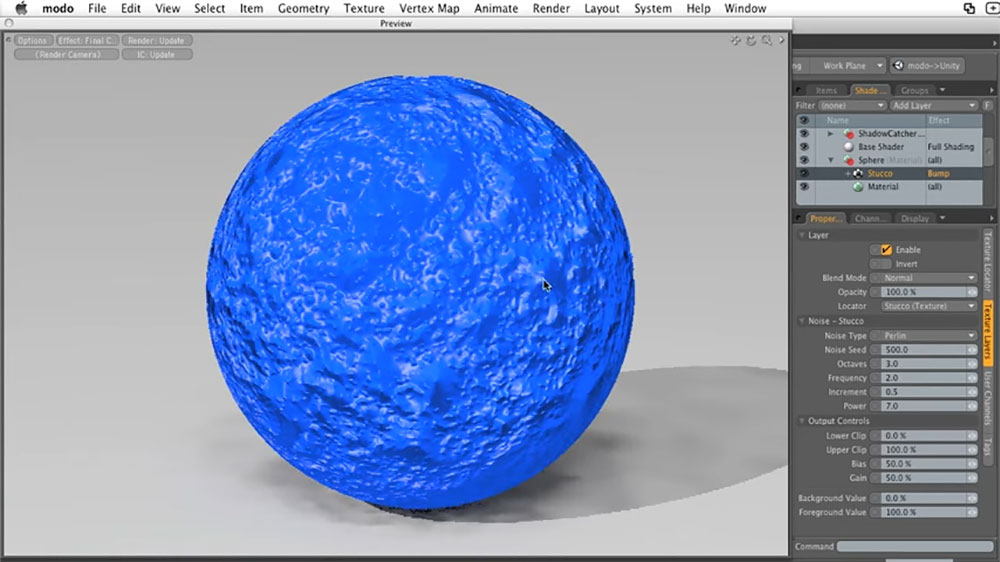
Bump maps are similar to the normal PBR maps but are more basic in that case. They are the least resource-intensive and use simple algorithms to alter the appearance of your 3D model.
Unlike normal maps, they don’t use RGB to dictate three dimensions of a space. Instead, they utilize grayscale maps that work in an up or down direction, where black is the lowest point of the geometry and white is the highest.
However, there is a disadvantage. Bump texture maps are the best fit for flat surfaces since faking the geometry on round objects and their edges is faltering.
This inaccuracy is why the scale is tipped in favor of the normal maps.
Reflection
Finally, the reflection maps are equivalent to the gloss/roughness maps in the PBR workflow. They are usually a constant value used to define where your object should cast a reflection.
Note: reflection is visible on the entire object, unless you use different materials.
Working with textures is not simple. You should have gotten it by now. Texture mapping is a critical skill to master as textures make your 3D object complete. So, it is an important step you can’t miss out on when you learn how to 3D model.
A plain polygon mesh wouldn’t be as stunning as it is with textures, don’t you agree?