How to Render in SketchUp: Built-in Tools, Plugins and AI
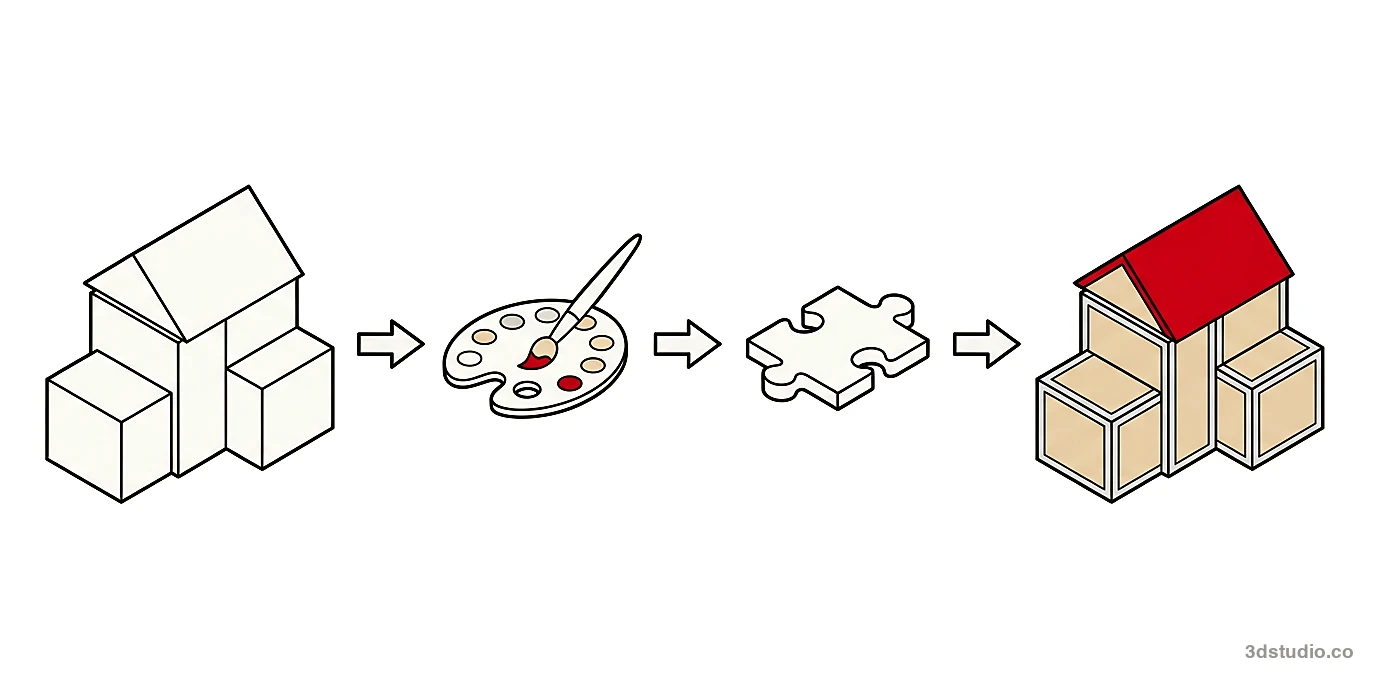
To render in SketchUp, use its built-in styles, add a render plugin, make an AI image from a screenshot, or send the model to a studio. Here is how each route works.
In this article
- SketchUp's own tools show the model in the viewport. A photoreal render needs a plugin, an AI tool or a studio.
- V-Ray, Enscape, D5 and Twinmotion each connect to SketchUp in a different way. There is no single best choice.
- An AI tool can make an image from a screenshot, but it does not check the result against your drawings.
- Clean the model, orient the faces, apply real materials, set the light and save the camera before any render.
To render in SketchUp, choose one of 4 routes: use SketchUp’s own styles, shadows and materials, add a render plugin such as V-Ray, Enscape, D5 or Twinmotion, make an AI image from a screenshot, or send the model to a studio. Which route fits depends on what the image is for.
A quick image for yourself needs little more than SketchUp. A client presentation usually needs a plugin or an AI tool. For images used in marketing, a planning submission or a competition, a studio builds the scene from the drawings and a person checks it. 3Dstudio.co offers architectural visualization from SketchUp files. This guide shows how to render in SketchUp with each route, how to prepare the model, and what usually goes wrong.
Ways to render a SketchUp model
SketchUp 3D rendering means turning the 3D model into an image of one view. The 4 routes differ in how much time they take, what they cost to set up, and how close the result gets to a photograph. They are listed below in order, from the most work you do yourself to the least.
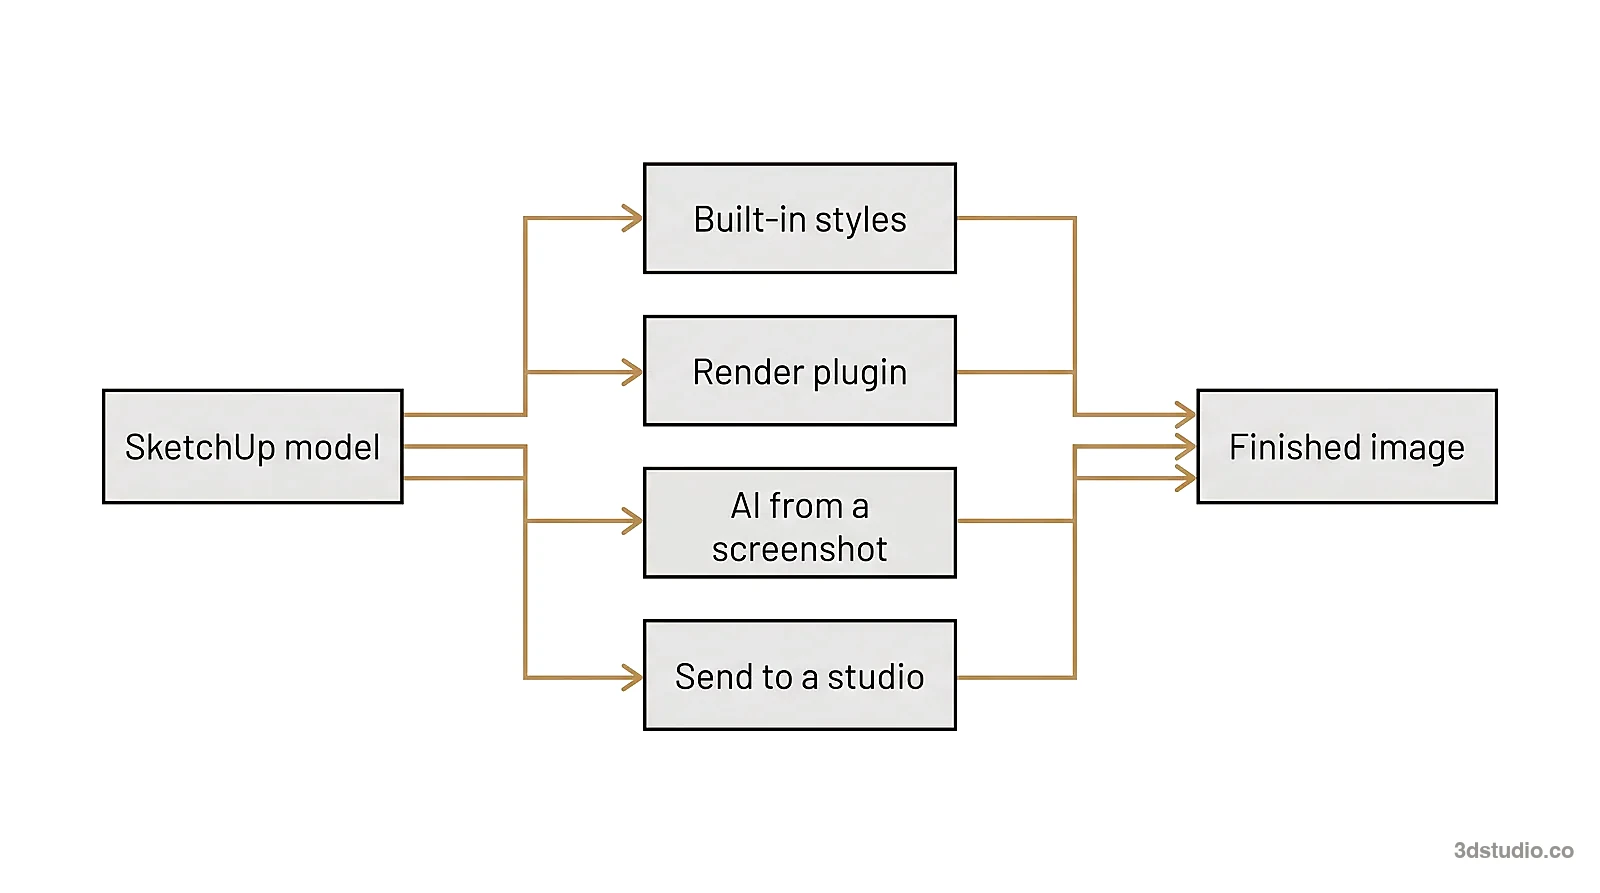
- SketchUp’s built-in tools. Styles, shadows, photoreal materials and environments change how the model looks in the viewport. You export that view as an image.
- A render plugin or engine. V-Ray, Enscape, D5 and Twinmotion calculate light and materials and give a photoreal image or animation.
- AI from a screenshot. An AI tool takes a picture of your model and returns a new image with materials, light and surroundings.
- A studio. You send the SketchUp file, and a visualization team builds the scene and delivers the images.
What SketchUp can render on its own
SketchUp shows your model in the viewport. It is not a ray-traced render engine, so reflections, soft light and glass look simpler than in a render plugin. What you control is the look of the viewport, and then you export the view as an image. These settings are described in the SketchUp help center:
Have a 3D model? 3Dstudio.co turns a screenshot of it into a photoreal image. The first render is ready in under 10 seconds. Free to start, no credit card.
Render your model free- Styles. A style is a set of edge, face and background settings. The predefined style categories include Ambient Occlusion, Sketchy Edges and Photo Modeling. Ambient Occlusion adds shading where faces and edges meet, which gives the model more depth.
- Shadows. The Shadows panel casts the sun’s shadows for a date and time of day. The model must be geolocated first, and the sun direction follows the model’s north orientation.
- Photoreal materials and environments. The face style Display Photoreal Materials uses physically based texture maps. An environment, which is an HDRI or OpenEXR image, adds a 360 degree background, light and reflections. The effect only shows if the style uses photoreal materials.
- Fog. The Fog panel makes distant parts of the model less clear.
- Scenes. A scene saves the camera, style, shadows, fog and visible tags, so you can return to the same view.
Export the view with File > Export > 2D Graphic. The raster options are JPEG, PNG, TIFF and BMP. This route suits design review, massing studies and images that show an idea, not a finished building.
SketchUp rendering plugins and engines
A SketchUp rendering plugin adds a render engine to your workflow. Some run inside SketchUp. Others are separate programs that read your model through a connection plugin. Each vendor’s site lists current system requirements, supported SketchUp versions and license terms, so check those before you choose.
- V-Ray. A rendering plugin for SketchUp made by Chaos, with real-time and ray-traced rendering. SketchUp states that a SketchUp Studio subscription includes V-Ray, and lists it as Windows only in that plan. See SketchUp’s page on V-Ray for SketchUp. It suits photoreal stills and animation where you want control over materials and light.
- Enscape. A real-time renderer, also from Chaos, that runs inside SketchUp as well as Revit, Rhino, Archicad and Vectorworks. You see the rendered view update as you model, which suits design review.
- D5 Render and D5 Lite. D5 Render is a real-time renderer. It connects to SketchUp through the D5 LiveSync plugin. D5 Lite is a plugin that works inside SketchUp itself. D5 lists a free option for individuals, so read its license terms before you use it for client work.
- Twinmotion. A real-time visualization program from Epic Games, based on Unreal Engine. It makes images, panoramas, videos and interactive presentations. It connects to SketchUp through the Datasmith Exporter plugin, whose Direct Link sends your model changes to Twinmotion with one click.
Real-time renderers show a result immediately and are usually quicker to learn. Ray-traced engines usually take longer per image and give more control over how materials and light behave. Both need a reasonably powerful computer. For a longer explanation of what makes a render photoreal, see our guide to photorealistic rendering.
SketchUp V-Ray rendering
SketchUp V-Ray rendering uses V-Ray, which some people write as VRay, to make photoreal images from a SketchUp model. Chaos describes V-Ray as a rendering plugin for SketchUp and offers a free trial. The SketchUp help center says a SketchUp Studio subscription includes V-Ray. Try it on one view of your own model first, then decide whether the learning time fits your projects.
Best rendering software for SketchUp compared
There is no single best rendering software for SketchUp. The right one depends on how often you render, how photoreal the image must be, and how much time you can spend learning it. This table puts the options side by side.
| Option | Type | How it works with SketchUp | Good for |
|---|---|---|---|
| SketchUp styles, shadows, environments | Viewport display | Built in | Design review, quick views |
| SketchUp AI Render | AI image from the viewport | Extension, needs a Go, Pro or Studio subscription | Quick concept images |
| V-Ray | Real-time and ray-traced renderer | Plugin inside SketchUp | Photoreal stills and animation |
| Enscape | Real-time renderer | Runs inside SketchUp | Design review while you model |
| D5 Render, D5 Lite | Real-time renderer | Plugins that sync or work inside SketchUp | Real-time views, animation, presentations |
| Twinmotion | Real-time visualization program | Datasmith Exporter plugin with Direct Link | Images, panoramas, videos, interactive views |
| Free AI rendering tool | AI image from a screenshot | Upload a screenshot, no plugin | Exploring options quickly |
| A studio | People build the scene | Send the SketchUp file | Final images that must match the drawings |
A simple way to choose:
- If you only need to show a design idea, stay with SketchUp’s own tools.
- If you render every week and want to do it yourself, learn one plugin and stay with it.
- If you need a few options quickly, use an AI tool.
- If you need a few important images and have no time to learn software, send the model to a studio.
AI rendering from a SketchUp screenshot
An AI render tool makes a new image from a picture of your model. It does not calculate light from a scene. SketchUp has its own version called AI Render. The SketchUp help center says it is an extension for SketchUp Desktop, that it needs an active Go, Pro or Studio subscription and an internet connection, and that each use costs AI credits. See SketchUp’s page on getting started with AI Render for the current requirements.
Our SketchUp AI rendering tool is free and is another way to get an image. It takes a screenshot of your 3D model, so you do not install anything and the model file is not uploaded. It works with screenshots from SketchUp, Revit, Archicad and Rhino.
How to make an AI render from SketchUp
- Frame the view in SketchUp. Set the face style to Shaded or Hidden Line. A plain model gives a cleaner input than one with strong shadows or textures you do not want in the picture.
- Export the view with File > Export > 2D Graphic and save a PNG. A normal screenshot of the window also works.
- Upload the image. Choose exterior or interior and the light, such as daylight, overcast, evening sun or dusk. Add a short note about materials if you want, for example timber cladding.
- Render, then download the image or try another light on the same view.
Example of a SketchUp screenshot and the AI render
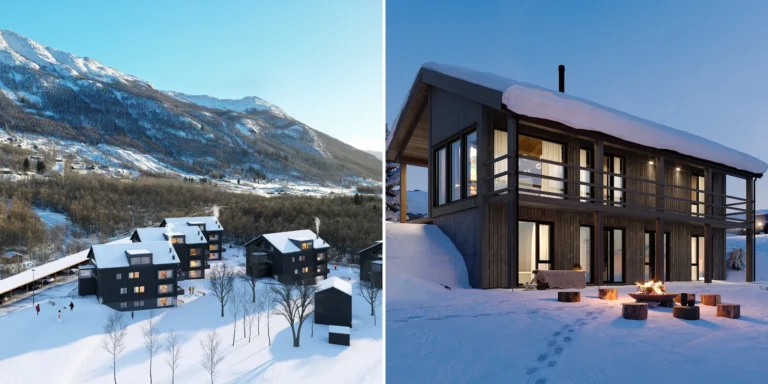
The first pair below shows the input and the output. The screenshot is the kind of view you export from SketchUp, and the render is the image the tool made from it.
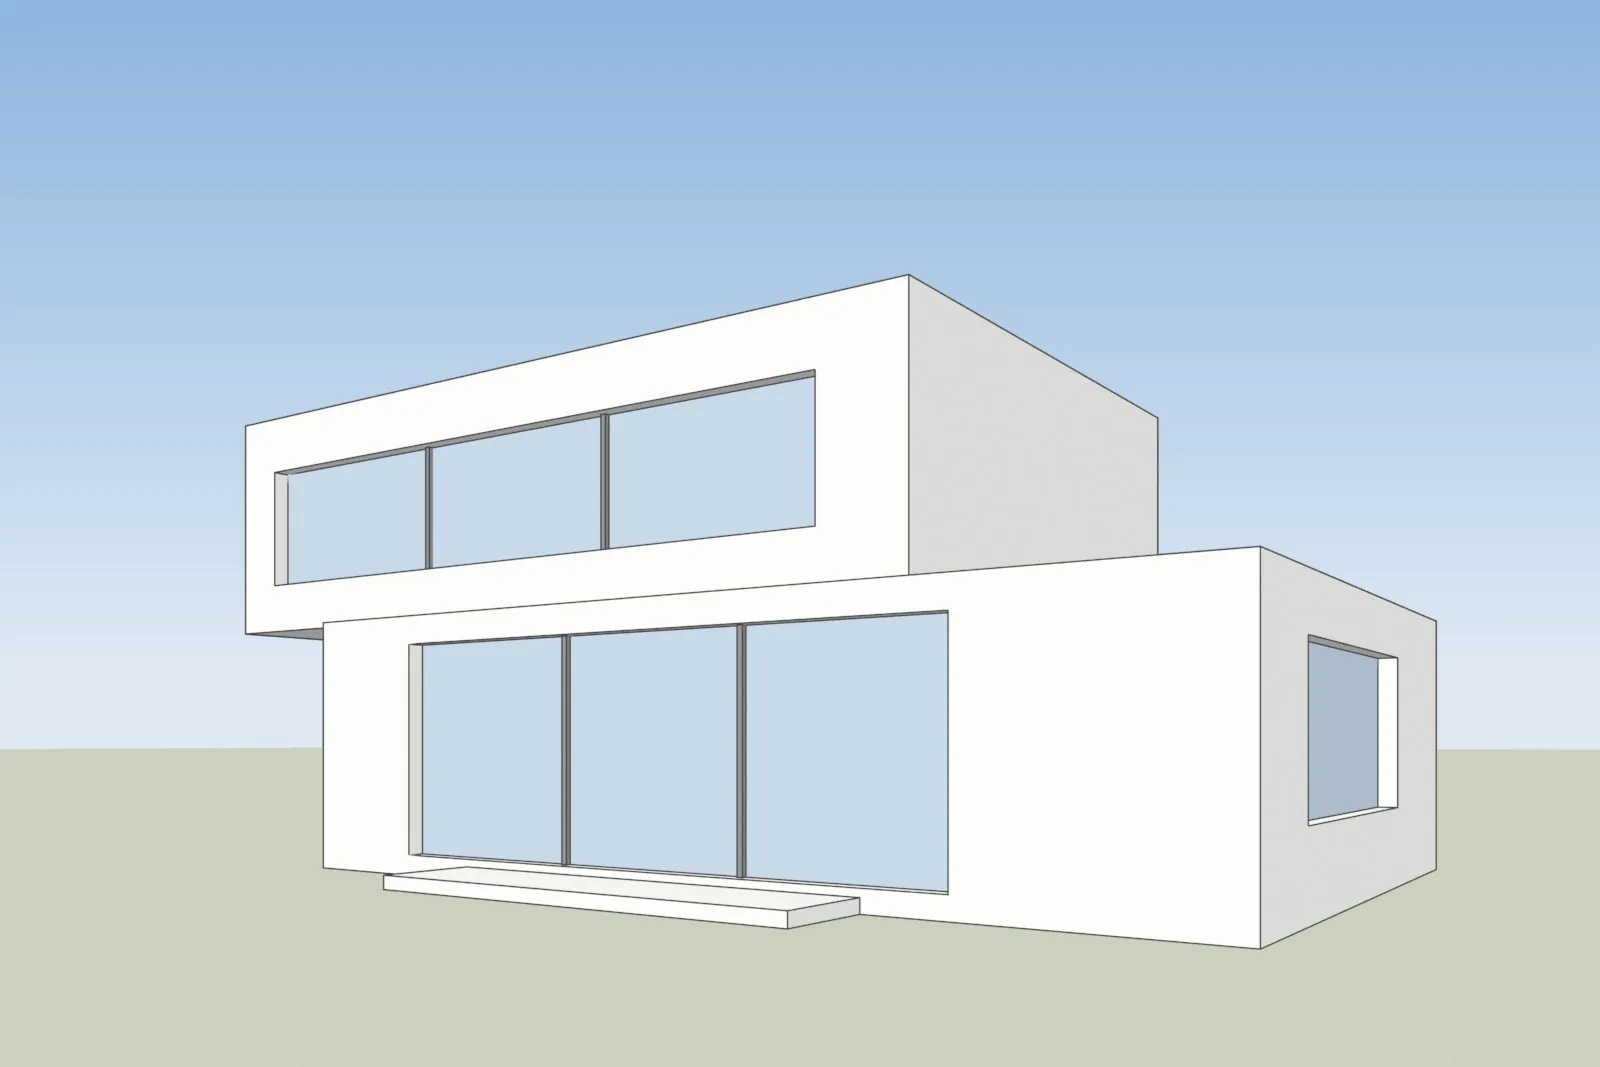
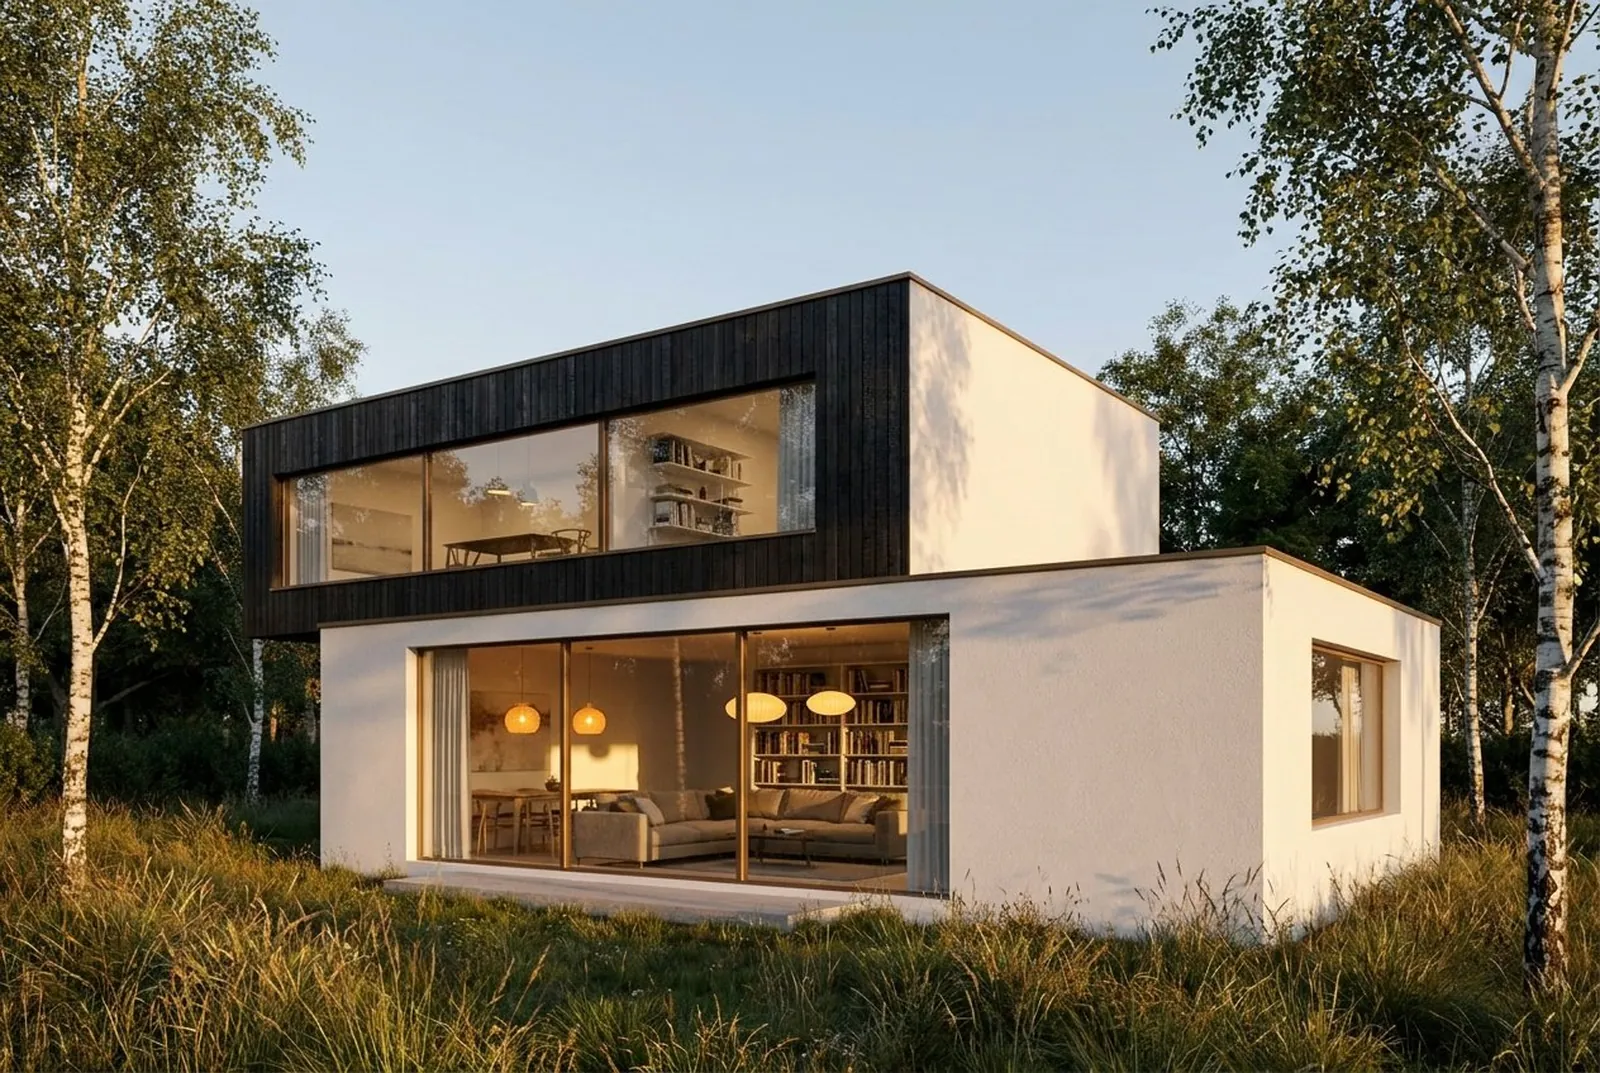
A SketchUp-style screenshot of a 3D model, left, and the free AI render tool’s image of the same view, right
What to check in an AI render
AI tools are good for exploring options and early concepts. Depending on the tool, details such as window frames, balconies or the roofline can change or come out simpler. Nothing in the output is checked against your drawings. Compare the result with the model before you show it to anyone. For images that must match the drawings, such as marketing, planning or a client or a jury, a studio builds the model from the drawings and a person checks it. Our article on AI architectural rendering covers this in more detail. The second pair below shows a glass pavilion cafe, where the thin columns and the roof edge are the details to compare with the model.
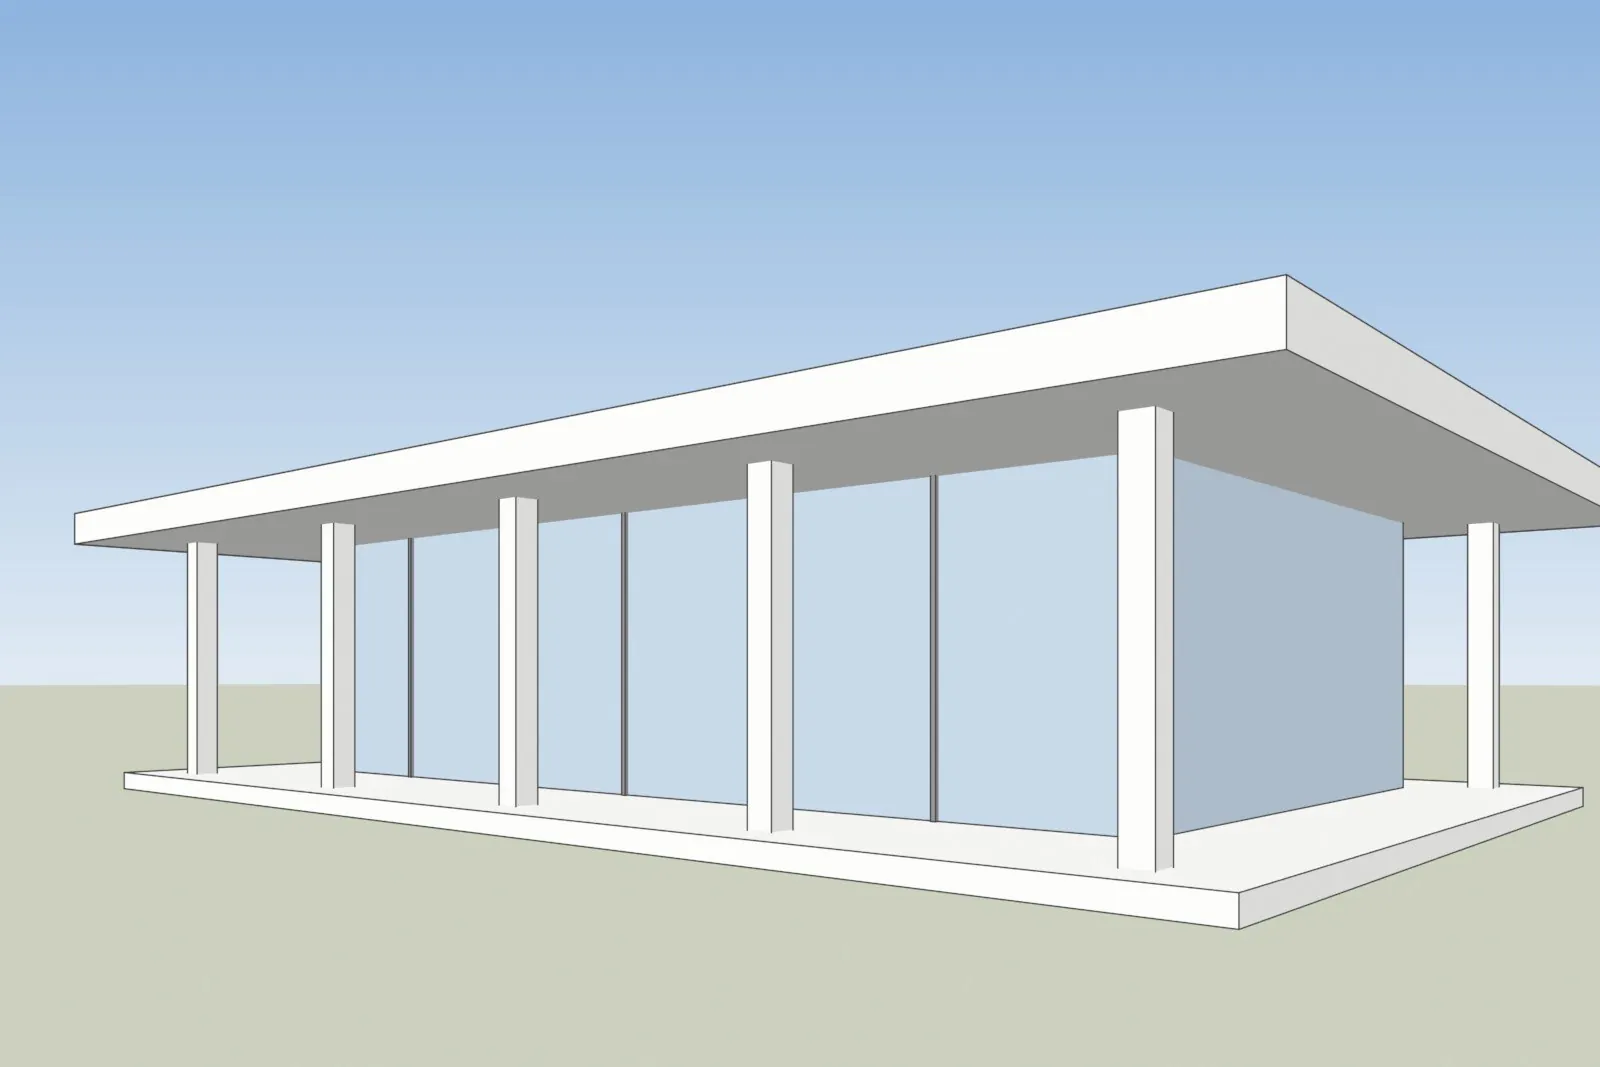
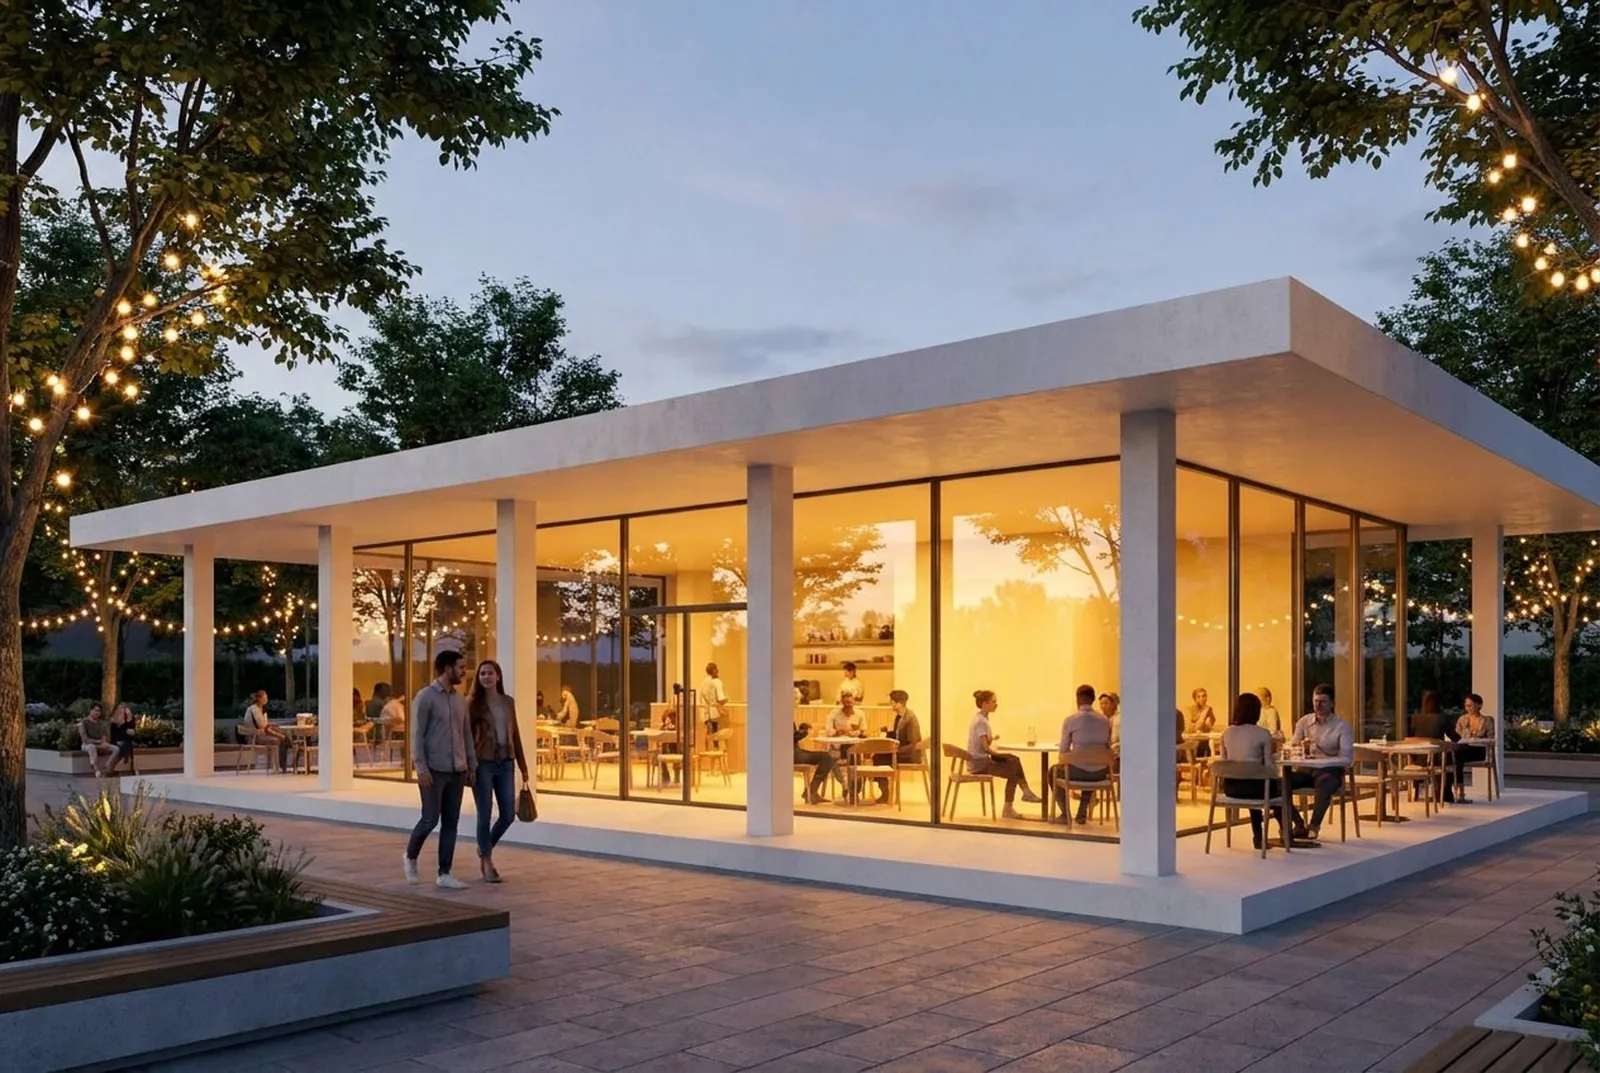
A SketchUp-style screenshot of a 3D model, left, and the free AI render tool’s image of the same view, right
How to prepare a SketchUp model for rendering
These steps apply to every route. A clean model with clear materials and one chosen camera gives a better result in any renderer.
- Clean the model. Deleted items stay in the file as model bloat. Use Window > Model Info > Statistics > Purge Unused. Reuse materials, and reduce the resolution of imported textures and the polygon count of imported components.
- Orient the faces. SketchUp faces have a front side and a back side. SketchUp advises that the front color faces outward. Inconsistent orientation can cause problems in rendering software. Use Orient Faces in the context menu for adjacent faces and Reverse Faces for single faces.
- Apply real materials. Use the Materials panel or the Paint Bucket tool (shortcut B). Give every visible surface a material that matches the real finish. Size the texture so the pattern has a believable scale, for example brick or floor boards. SketchUp’s Generate Textures feature can create metalness, roughness, normal and ambient occlusion maps for materials that have none.
- Set the light. Geolocate the model, then set the date and time in the Shadows panel. If you use an environment, you can set the sun location in the Environments panel instead. That setting overrides the Shadows panel. A low sun in the evening gives long shadows, and an overcast environment gives soft, even light.
- Place the camera. Set the view at about eye level for an exterior or interior view, and keep vertical lines vertical, for example with the two-point perspective option in the Camera menu. Check the field of view. Save the view as a scene so you can return to it.
- Add context. Add trees, people, furniture and surrounding buildings. Keep distant items simple, and hide everything the camera does not see with tags.
- Export. For a SketchUp image, use File > Export > 2D Graphic. Clear Use View Size and enter the width and height you need, and keep Anti-alias on. Choose PNG for sharp edges, or JPEG for a smaller file. Plugins and engines have their own render and output settings.
Tip: render at a small size first. Fix the camera, materials and light at a low resolution, then render once at the final size.
Common SketchUp rendering problems
- Dark or patchy surfaces. Often a face points the wrong way. Select the faces and use Orient Faces or Reverse Faces.
- Photoreal materials look flat. The style must use Display Photoreal Materials, and an environment must be selected. Check both.
- No shadows or wrong shadows. The Shadows panel needs a geolocated model, the right north direction and a time and date. Check that shadows are switched on.
- Blurry or stretched textures. SketchUp reduces very large texture images. Resize them in an image editor, crop them to the part you need, and check the texture position on the face.
- Slow viewport or long renders. Purge unused items, reduce heavy components and high resolution textures, and hide what the camera does not see.
- Jagged edges in an export. Keep Anti-alias selected in the export options, or export at a larger size.
- An AI render changes a detail. Thin window bars, railings or the roofline can come out different from the model. Compare with the model, and render again with a note about the detail.
When to send the SketchUp model to a studio
A studio is the better choice when the image has to match the drawings, and when your time is better spent on design. That is usually the case for marketing images, a planning submission, a competition entry, or a client presentation where the building must match the drawings. It also makes sense when you need several views of the same scene, or when learning a render engine does not fit the project date.
3Dstudio.co accepts SketchUp files, and also CAD, PDF plans, Revit, ArchiCAD and IFC. You upload the files, and you get a reply within 30 minutes: a fixed price and a delivery date, or the 1-2 questions we need answered first. A clay model comes first, so camera, lens and time of day are agreed while changes are cheap. A photoreal first look follows, with 2 revision rounds included, and final images are delivered in 4K with full usage rights. Projects start at €1,000. See how the price is set and what drives the cost of 3D rendering.
If you do not have a model yet, we can build it from drawings through our 3D modeling service. To prepare a SketchUp file for a studio, see our guide to architectural 3D modeling and how to write a 3D rendering brief. You can see the finished work in the portfolio, and the steps in how it works.
Questions about SketchUp rendering
Can you render in SketchUp without a plugin?
You can export an image of the viewport with styles, shadows, photoreal materials and an environment. That is a viewport image and not a ray-traced render. For a photoreal render you need a plugin or engine, an AI tool, or a studio.
What renderer does SketchUp use?
SketchUp displays the model in its viewport and does not use a ray-traced renderer by itself. SketchUp Studio includes V-Ray, which is a render engine. Other engines, such as Enscape, D5 and Twinmotion, are added separately.
Is SketchUp AI rendering free?
SketchUp’s own AI Render needs an active Go, Pro or Studio subscription and uses AI credits. Our free AI rendering tool works from a screenshot of your model. It is free to try, and its page lists the current limits. To compare AI tools, see the best AI rendering software list.
Which render plugin is easiest to learn for SketchUp?
Real-time tools such as Enscape, D5 and Twinmotion show the result while you work, which makes them quick to start with. Ray-traced engines such as V-Ray take longer to learn and give more control. Check each vendor’s trial or free option, and test one on your own model. For AI rendering against these tools, read AI rendering vs V-Ray and Enscape.
How do I get a render of a SketchUp model without learning software?
Use an AI tool for quick options, or send the SketchUp file to a studio. A studio builds the scene, sets the light and cameras, and delivers the final images.
Diagrams in this post are drawn with an AI image tool from our brief and checked by our team.
More on AI rendering
- 3Dstudio.co AI Render
- SketchUp AI rendering
- Twinmotion Price in 2026: Free Tier, Seats and Real Costs
- D5 Render Price in 2026: Community, Pro, Teams and Real Costs
- Lumion Price in 2026: Every Plan, Real Costs and a Cheaper Route
- V-Ray Price in 2026: Plans, Licenses, Host Programs and a Cheaper Route
- Enscape Price in 2026: Every Plan, What It Includes and a Cheaper Route
- Nano Banana Architecture: How to Keep Your Design in AI Renders
- SketchUp Diffusion: What It Is Now, What It Costs and How to Keep Your Model
- AI Rendering for Architects: How to Keep Your Design
- ArchiVinci Alternative: An Honest Comparison for Architects
- Gendo AI Alternative: An Honest Comparison for Architects
- mnml.ai Alternative: An Honest Comparison for Architects
- Rendair Alternative: An Honest Comparison for Architects