3D Modeling in Blender: A Step-by-Step Beginner Tutorial
A step by step Blender tutorial with exact shortcuts, a first model in 10 steps, modifiers, UVs, materials, rendering, common fixes and export for games and 3D printing.
In this article
- The shortcuts that matter in one table, plus a first model in 10 steps: a simple stool
- How Edit Mode, modifiers, UV unwrapping, materials and rendering fit together
- Fixes for the most common beginner problems, with the exact menu paths
- Which format to export for game engines and 3D printing, and what to send if you want a studio to build the model
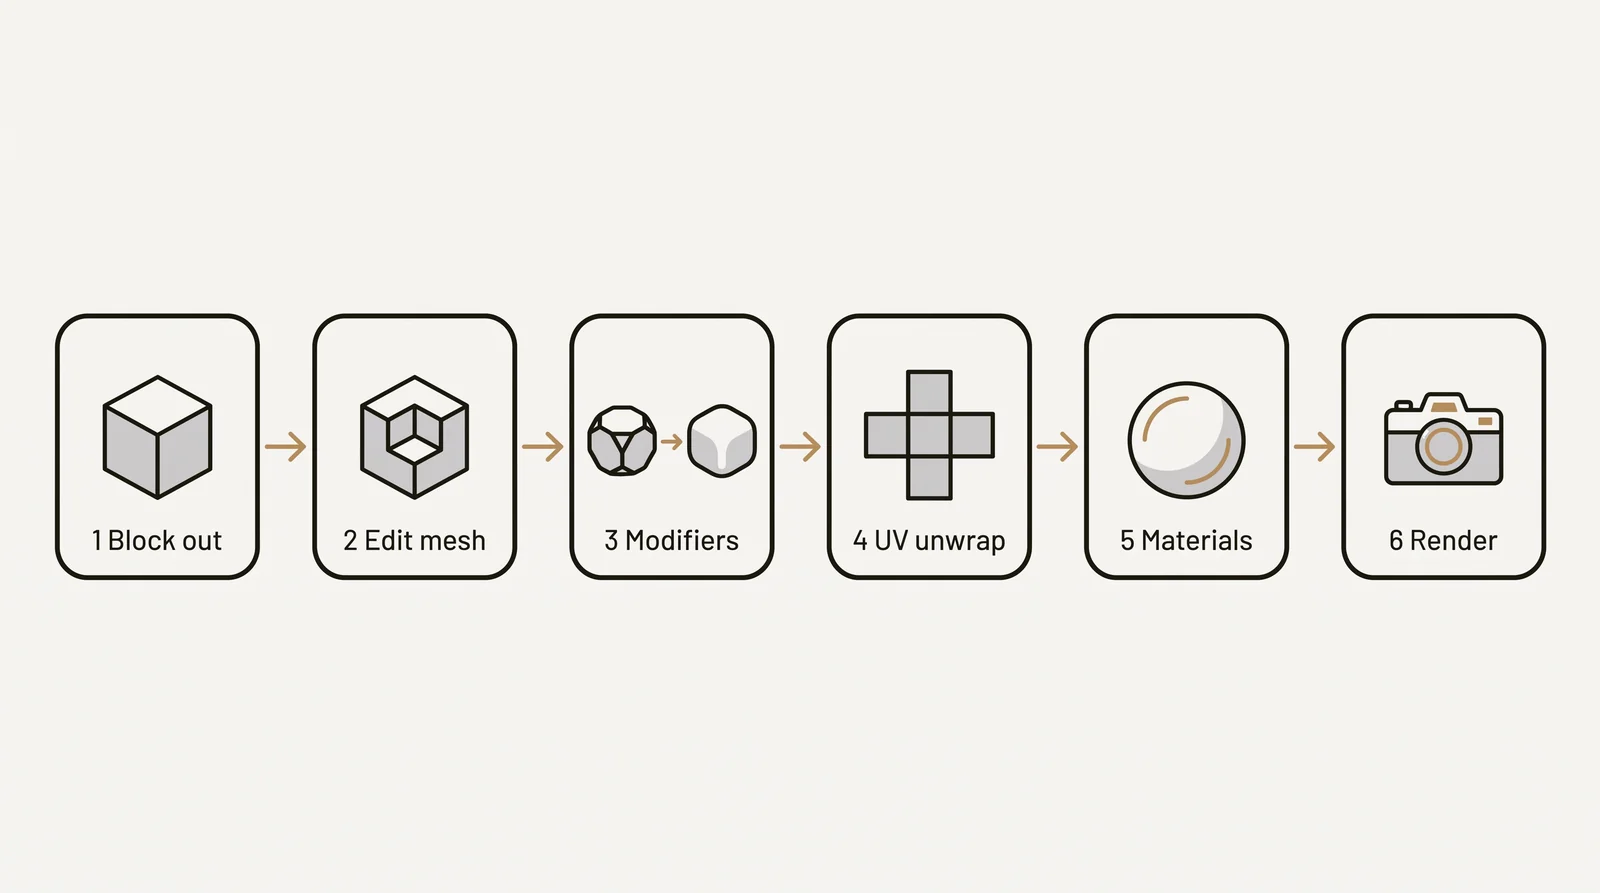
To model in Blender, add a shape with Shift+A, press Tab to enter Edit Mode, and shape the mesh with Extrude (E), Loop Cut (Ctrl+R), Inset (I) and Bevel (Ctrl+B). Then add modifiers such as Mirror and Subdivision Surface, unwrap the UVs, add a material and render with F12.
This Blender tutorial follows that order with exact keys and menu paths. It has a shortcut table, a first model in 10 numbered steps, a table of common beginner problems with fixes, and an export guide for game engines and 3D printing. Keys and menus were checked against the Blender 5.2 LTS manual in October 2026. If you would rather not learn the software, 3Dstudio.co’s 3D modeling service builds the model for you.
Blender interface basics
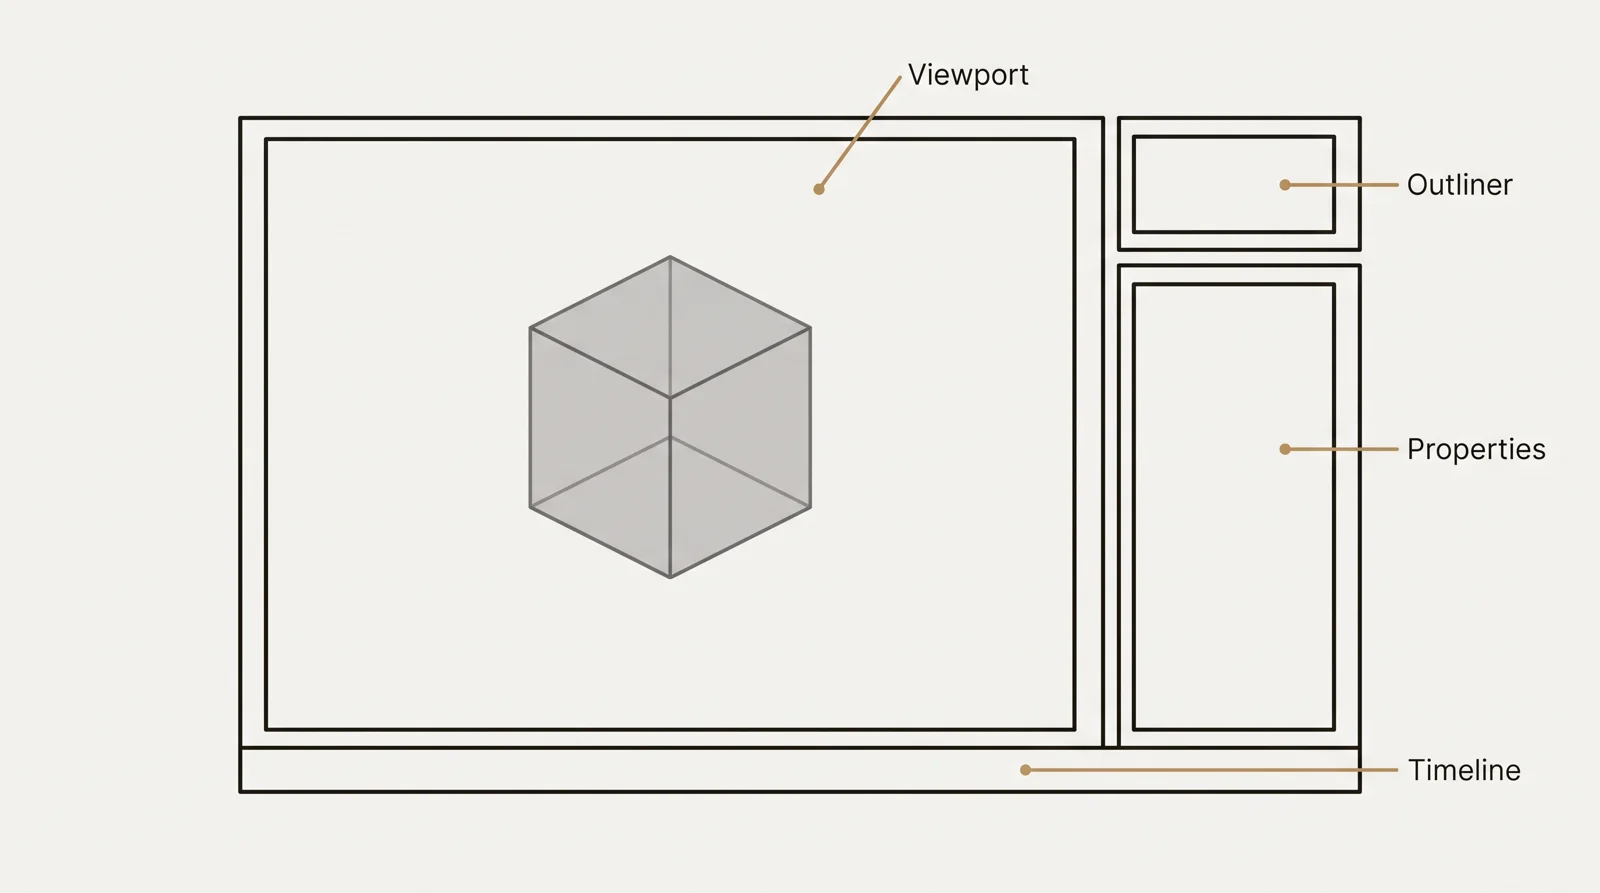
Blender is free, open source 3D software for 3D modeling, rendering and animation. It opens in the Layout workspace, which has 4 main areas: the 3D viewport (the large area where you work), the outliner (a list of every object in the scene, top right), the properties panel (settings for the selected object, bottom right) and the timeline (for animation, along the bottom). You do not need the timeline for a first model.
The row of tabs along the top bar switches workspaces. Each tab opens the editors that one stage of this tutorial needs:
- Modeling: mesh editing tools, for the edit mode and first model sections
- Sculpting: brushes, for the organic object section
- UV Editing: the UV editor next to the 3D viewport
- Shading: the shader editor, for connecting image textures to a material
- Rendering: a large image view for checking render results
In the viewport, a middle mouse drag orbits the view, shift plus middle mouse pans, and the scroll wheel zooms. The navigation gizmo (the colored axis icon in the top right corner of the viewport) does the same with the left mouse button: drag it to orbit, click an axis to look straight along it.
On a laptop, you may have no middle mouse button and no numpad. Open Edit > Preferences > Input and turn on 2 settings. Emulate Numpad makes the top row number keys act as numpad keys. With it on, those keys change the view in Edit Mode too, so switch between vertex, edge and face select with the 3 buttons in the viewport header instead. Emulate 3 Button Mouse makes Alt plus left mouse drag orbit the view.
Blender modeling shortcuts for beginners
These are the keys used in the rest of this tutorial. Hover the mouse over the 3D viewport before pressing them. The keys 1, 2 and 3 are the top row number keys, not the numpad, where the same digits change the view instead.
| Action | Shortcut | Mode |
|---|---|---|
| Add an object | Shift+A | Object and Edit |
| Move, rotate, scale | G, R, S (then X, Y or Z to lock an axis) | Object and Edit |
| Switch between Object Mode and Edit Mode | Tab | Both |
| Select vertex, edge or face | 1, 2, 3 (top row) | Edit |
| Select an edge loop | Alt+click an edge | Edit |
| Select everything connected under the mouse | L | Edit |
| Select all, select none | A, Alt+A | Both |
| Extrude | E | Edit |
| Inset faces | I | Edit |
| Loop cut | Ctrl+R (scroll the wheel to add more cuts) | Edit |
| Bevel edges | Ctrl+B | Edit |
| Knife | K | Edit |
| Make an edge or face from selected vertices | F | Edit |
| Merge vertices | M | Edit |
| Delete | X (asks first) or Delete key | Both |
| Hide selected, reveal hidden | H, Alt+H | Both |
| Recalculate normals outside | Shift+N | Edit |
| Mark a UV seam | Ctrl+E, then Mark Seam | Edit |
| Apply scale, rotation or location | Ctrl+A | Object |
| Add a Subdivision Surface modifier | Ctrl+1 (or Ctrl+2, Ctrl+3) | Object |
| Front, right and top view | Numpad 1, Numpad 3, Numpad 7 | Both |
| Camera view | Numpad 0 | Both |
| Isolate the selected object (local view) | Numpad / | Both |
| See through objects (X-ray) | Alt+Z | Both |
| Change settings of the last action | F9 | Both |
| Search every menu command | F3 | Both |
| Undo, redo | Ctrl+Z, Shift+Ctrl+Z | Both |
| Save, save a numbered copy | Ctrl+S, Ctrl+Alt+S | Both |
| Render the current frame | F12 | Both |
On macOS, file and undo commands use Cmd instead of Ctrl (Cmd+S, Cmd+Z). The full list is in Blender’s default keymap page. If you forget a key, F3 finds any command by name and shows its shortcut.
Edit mode and mesh basics
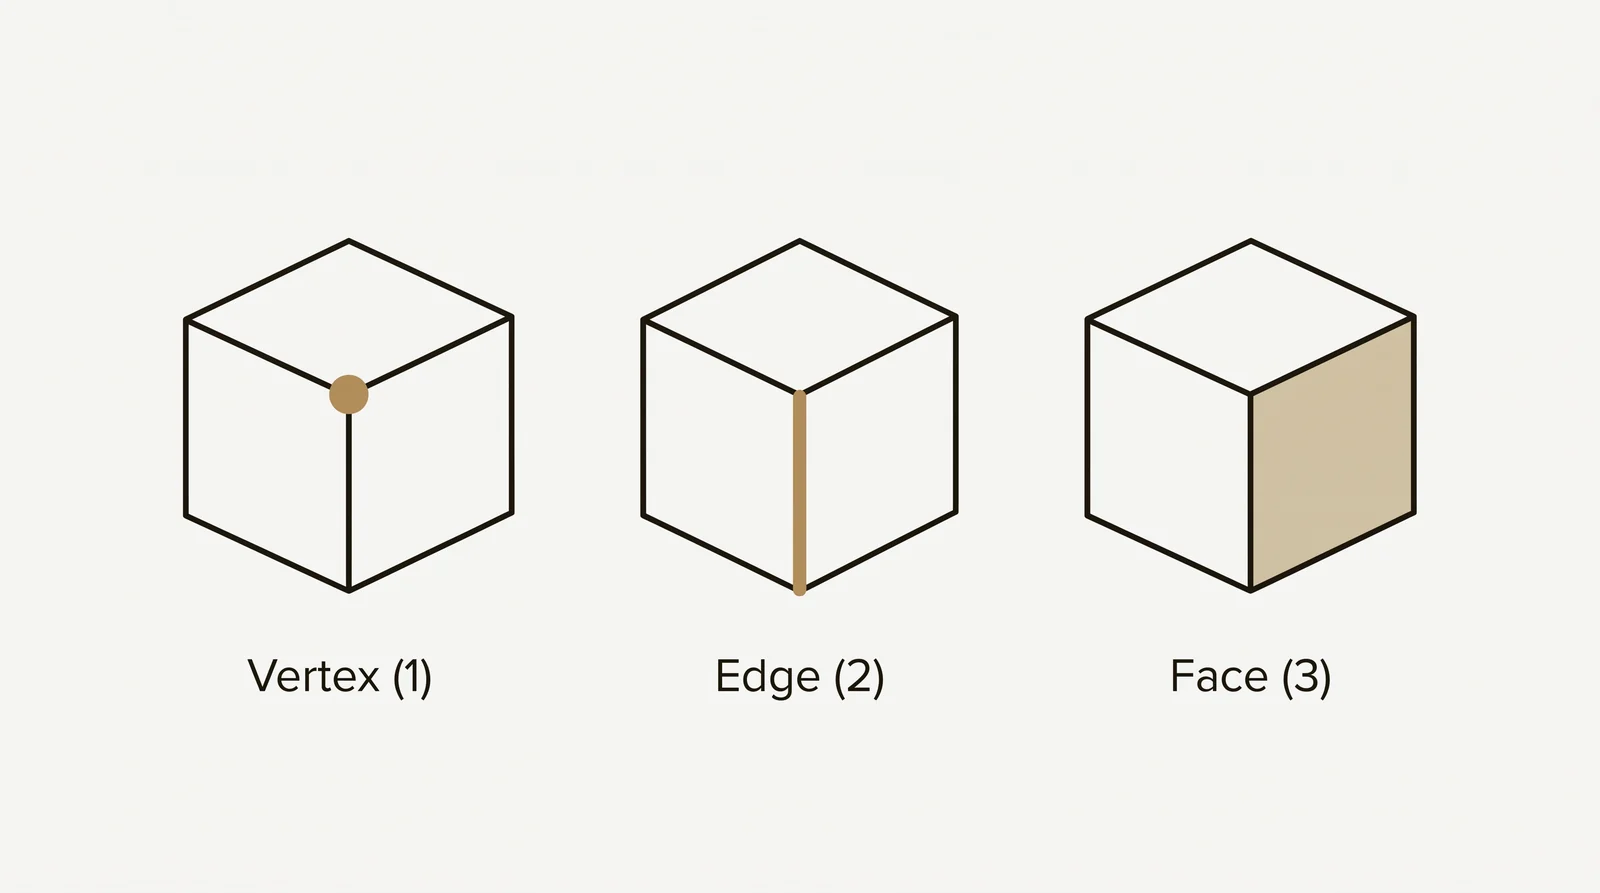
A 3D mesh is built from vertices (points), edges (lines between two vertices) and faces (flat surfaces bounded by edges). Every polygon mesh is made of these three. A new object starts in Object Mode, where you move, scale and rotate the whole object. Tab switches to Edit Mode, where you work on the vertices, edges and faces. Tab is the shortcut you will press most.
Four tools cover most beginner modeling:
- Extrude (E): pulls new geometry out of the selection. This is the main way to add volume. Press E, then move the mouse or type a distance and press Enter.
- Inset (I): creates a smaller border of faces inside the selected faces. Use it to mark where a leg, a handle or a recess will go.
- Loop cut (Ctrl+R): adds a ring of edges around a shape. Hover over an edge until a yellow line previews the cut, scroll the wheel to add more cuts, click to confirm, then right-click to keep the cut centered.
- Bevel (Ctrl+B): rounds a sharp edge. Move the mouse to set the width and scroll the wheel to set the number of segments.
2 more tools are worth knowing early. Merge (M) joins vertices, and Merge > By Distance joins vertices that sit on top of each other. Knife (K) cuts new edges across a face. For the same ideas in any 3D program, see our guide on how to 3D model, step by step in any software. This tutorial stays inside Blender.
Tip: Press Ctrl+Alt+S (File > Save Incremental) to save a numbered copy before a risky step. Blender also keeps the previous save as a .blend1 file next to your file. Edit > Preferences > Save & Load > Save Versions sets how many older versions it keeps.
Modifiers
A modifier changes how a mesh looks without changing its vertices, edges and faces. You can turn a modifier off or delete it at any time, and the mesh underneath stays as it was. Several modifiers can stack on one object, and they run from top to bottom. Add them in the properties panel: click the wrench icon, then Add Modifier.
| Modifier | What it does | Typical use |
|---|---|---|
| Mirror | Copies one half of the mesh to the other side | Symmetrical objects: model half, get the whole. Turn on Clipping so the middle vertices stay on the mirror plane, and Merge so the halves join. |
| Subdivision Surface | Splits each face into smaller ones and smooths the result | Rounded, organic shapes from a blocky mesh |
| Bevel | Rounds edges. The Limit Method setting chooses which: Angle bevels only sharp edges, None bevels all edges. | Hard surface objects whose edges should catch light |
| Array | Repeats an object a set number of times along an offset | Fences, stairs, columns, radiators |
| Boolean | Adds, subtracts or intersects two objects | Cutting a hole, a slot or a window opening through a shape |
Apply a modifier (from its drop-down menu) only when the shape underneath is finished. Applying turns the modifier into real geometry and cannot be turned off afterward.
Topology basics for Subdivision Surface
Subdivision Surface shows every weakness in the mesh. Keep faces as quads (4 sided) in areas that will curve. Avoid triangles and faces with more than 4 sides there, because they cause pinches and dents. Avoid poles on curved surfaces. A pole is a vertex where 3 edges meet, or 5 or more. To keep an edge sharp under Subdivision Surface, add support loops with Ctrl+R close to that edge.
Your first hard surface model in Blender, step by step
Hard surface modeling means objects with flat faces and straight edges, such as furniture, hardware and buildings. The tools are the ones above: scale, loop cut, extrude and bevel. For the wider difference between hard surface and organic work, see hard surface vs organic modeling. This model is a stool with a thick seat and 4 square legs. Start with the default scene.
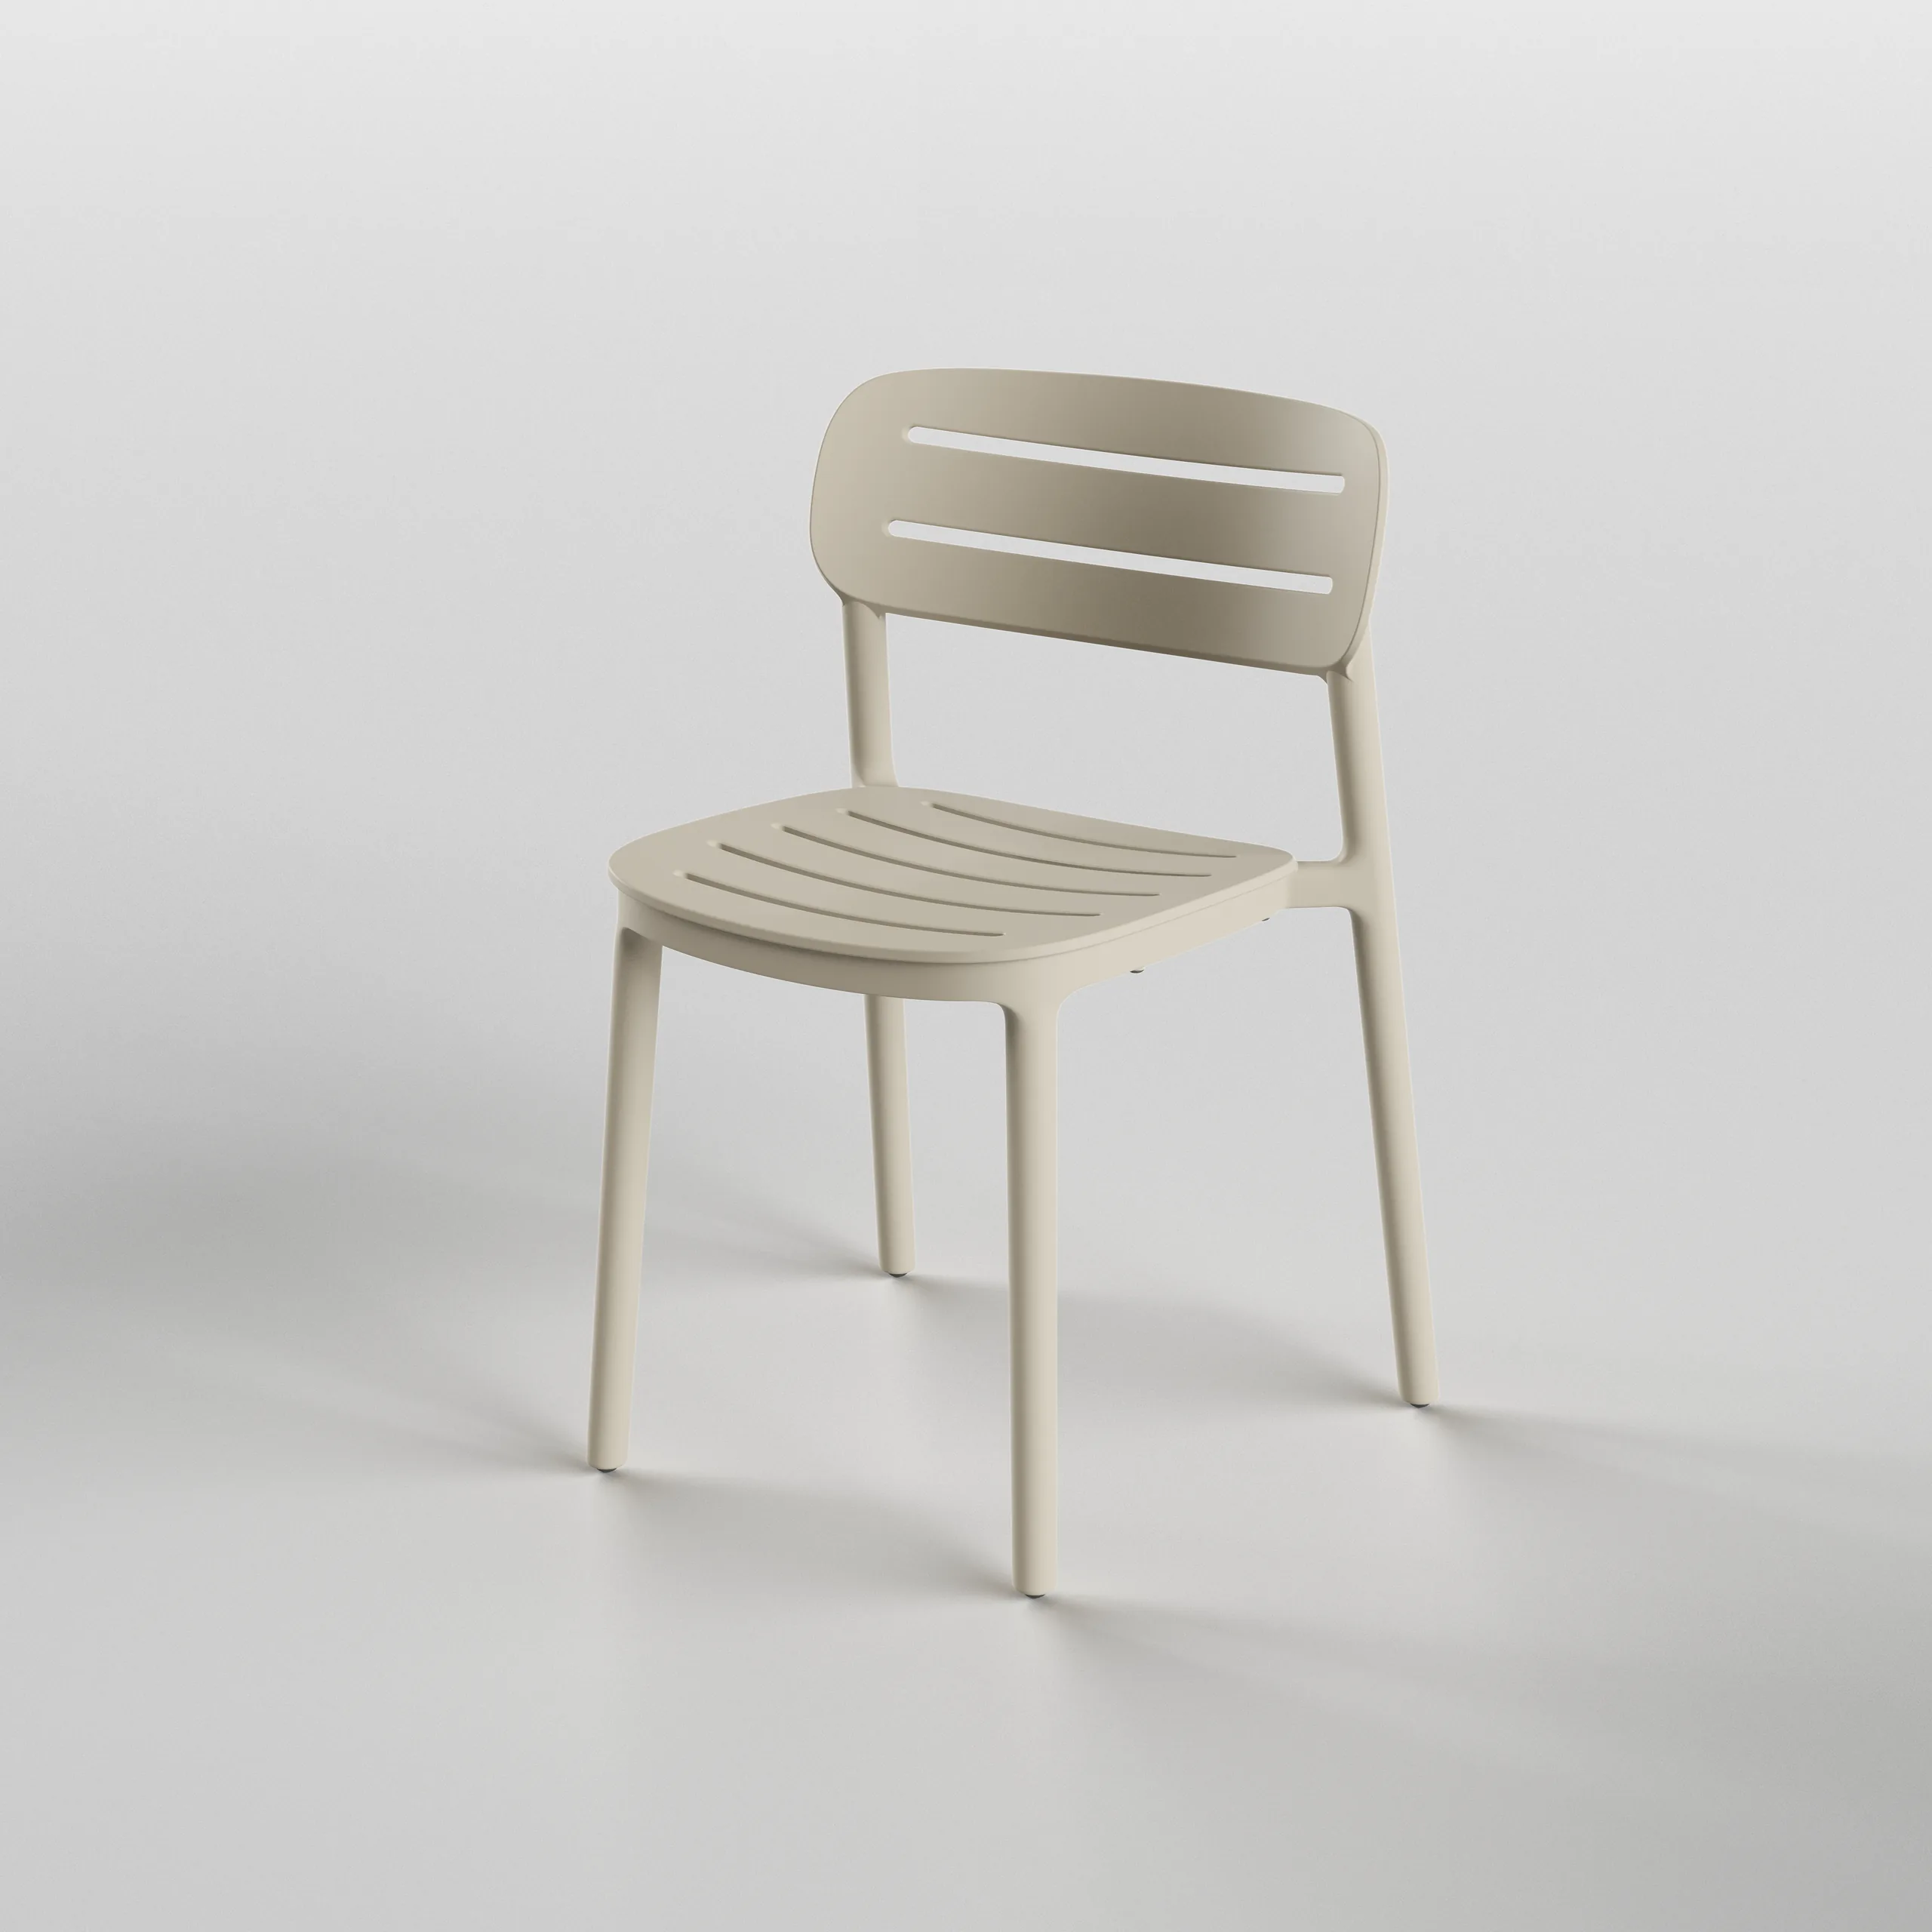
- Click the default cube in the viewport to select it. Press S, then Z, type 0.2 and press Enter. The cube is now a flat slab. This is the seat.
- Press Ctrl+A and choose Scale. This sets the object’s scale back to 1 without changing how it looks. Later modifiers need this, or the bevel looks stretched.
- Press Tab for Edit Mode. Hover over an edge on the slab, press Ctrl+R, scroll the wheel once to make 2 cuts, click, then right-click to center them. Repeat on an edge that runs the other way. The top and bottom faces are now split into a grid of 9.
- Press 3 for face select, then Ctrl+Numpad 7 for the bottom view. Click one corner face, then Shift+click the other 3 corner faces.
- Press E, type 1 and press Enter. The bottom faces point down, so the 4 legs grow downward. If they grow upward, press Ctrl+Z and extrude again with -1.
- Press Tab for Object Mode. In the properties panel, open the wrench tab, click Add Modifier > Generate > Bevel. Set a small Width and 3 Segments. Check that Limit Method is Angle, so only the sharp edges are rounded and the flat loop cut lines are left alone.
- Choose Object > Shade Auto Smooth. This adds a Smooth by Angle modifier, so rounded bevels shade smoothly while the flat faces stay flat.
- Open the Material tab. The default cube already has a material, so there is nothing to add. Set its Base Color and Roughness (a higher roughness looks more matte).
- Press Numpad 0 for camera view. The default scene already has a camera and a light. Press F12 to render.
- Save with Ctrl+S. You now have a finished model, built with the same workflow as larger ones: block out, cut, extrude, bevel, shade, render.
To repeat the exercise on something harder, try a mug (a cylinder with an inset and an extrude for the hollow), or a low table. Reference images, even a few photos, make proportions easier to get right.
Modeling a first organic object
Organic shapes are curved and irregular: characters, plants, rocks. They are built by sculpting, which pushes the surface like digital clay. Brushes only affect the real mesh, so the mesh needs enough faces first. A Subdivision Surface modifier that has not been applied does not count.
- Press Shift+A > Mesh > UV Sphere to add the base shape.
- Click the Sculpting tab in the top bar.
- In the Remesh panel, set a Voxel Size (smaller values give a denser mesh), then click Voxel Remesh or press Ctrl+R. The sphere now has an even grid of small faces.
- Use 4 starter brushes: Draw raises the surface (hold Ctrl to push it in), Clay Strips builds up flat volumes, Grab pulls a whole area, and Smooth (hold Shift while you sculpt) evens out bumps.
- For a symmetrical object, check that X is turned on under Symmetry (the butterfly icon in the header), so a stroke on one side repeats on the other.
- If strokes stretch the faces, run Voxel Remesh again.
Voxel Remesh has 3 limits. It ignores geometry made by modifiers. It removes UVs and other mesh data layers, so unwrap the UVs after sculpting. It does not work together with a Multiresolution modifier. Choose one method per object: voxel remesh for free-form shapes, or Multiresolution (press Subdivide) when you start from a clean base mesh and want several detail levels.
Sculpting is covered further in our 3D sculpting software guide.
UVs and materials
A model needs UV coordinates before an image texture can sit on it correctly. Open the UV Editing tab, go to Edit Mode and select the faces. Mark seams on the edges where the surface should be cut open (select the edges, press Ctrl+E, then Mark Seam). Then choose a method from the UV menu, such as Smart UV Project for a quick result. Marked seams give you control over where the cut lines fall. The full process is in this guide to UV unwrapping.
Materials control how a surface reacts to light. Blender’s default Principled BSDF shader starts with a base color and a roughness value for how matte or shiny the surface looks. These 2 settings are enough for a first material. To use an image texture, switch to the Shading tab, add an Image Texture node in the shader editor and connect it to the Principled BSDF input you want to drive, such as Base Color. Our guide to how texture maps work in 3D explains what each map does.
Rendering the model
Rendering turns the 3D scene into a 2D image. Blender includes 3 render engines. EEVEE renders in real time and is fast enough to preview lighting changes as they happen. Cycles traces light as a path tracer and takes longer per image. Workbench is designed for layout, modeling and previews. EEVEE is normally enough while you learn, and Cycles is worth switching to when the lighting needs to look closer to photoreal. Choose the engine in the Render tab of the properties panel.
The pair below shows the two ends of the process on an exterior scene: the model in the viewport with flat colors, and the finished render with materials and lighting added.
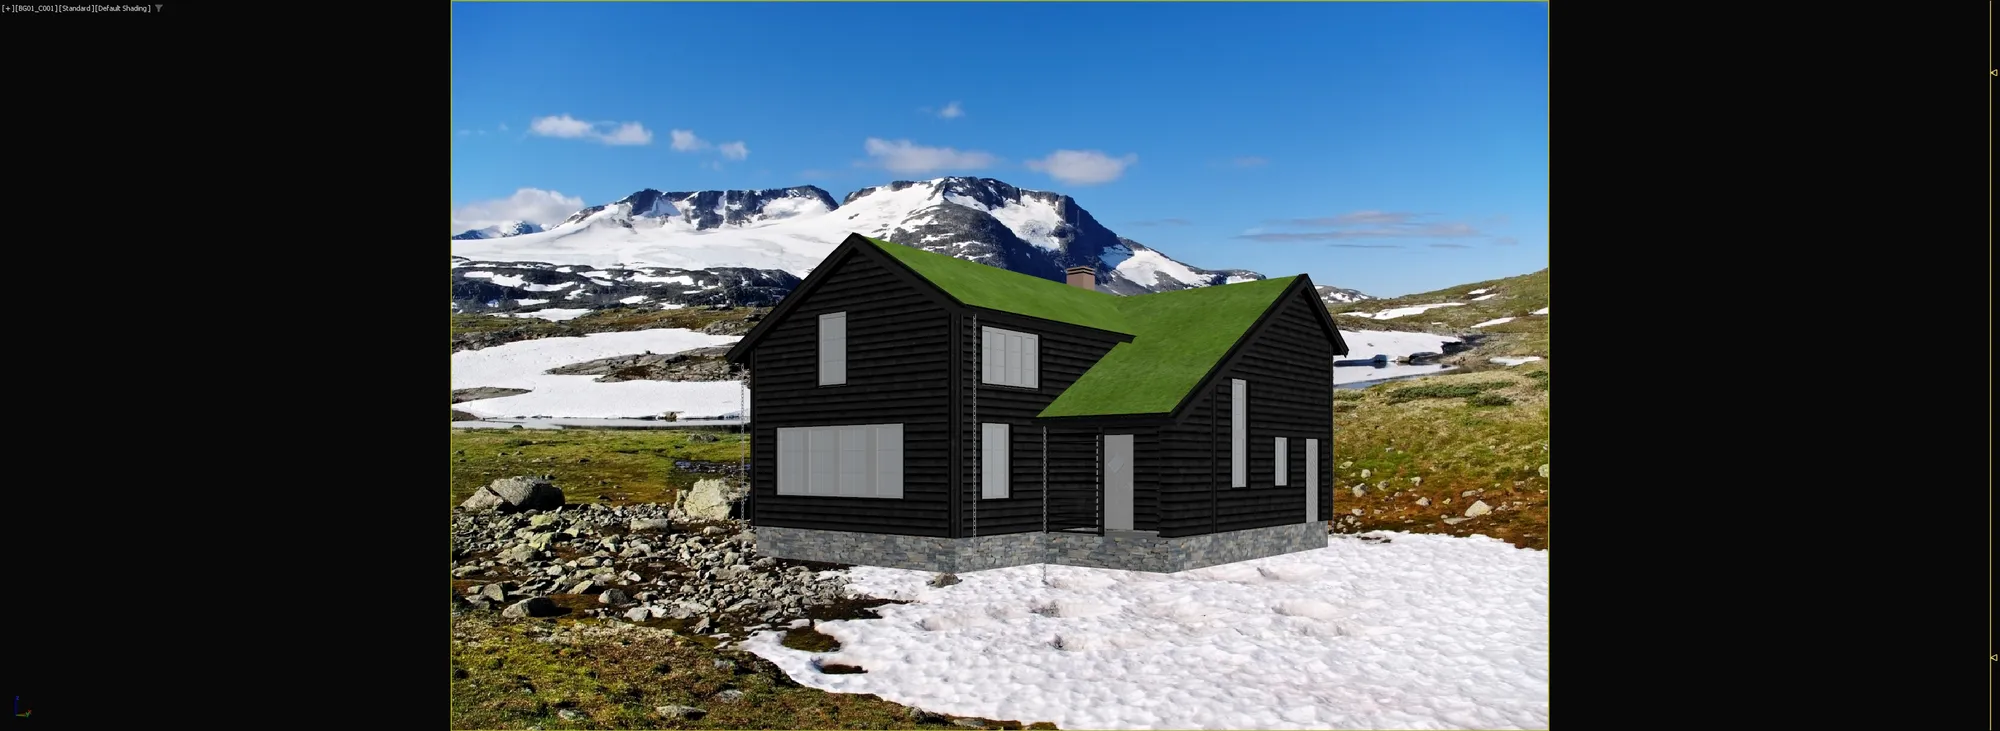
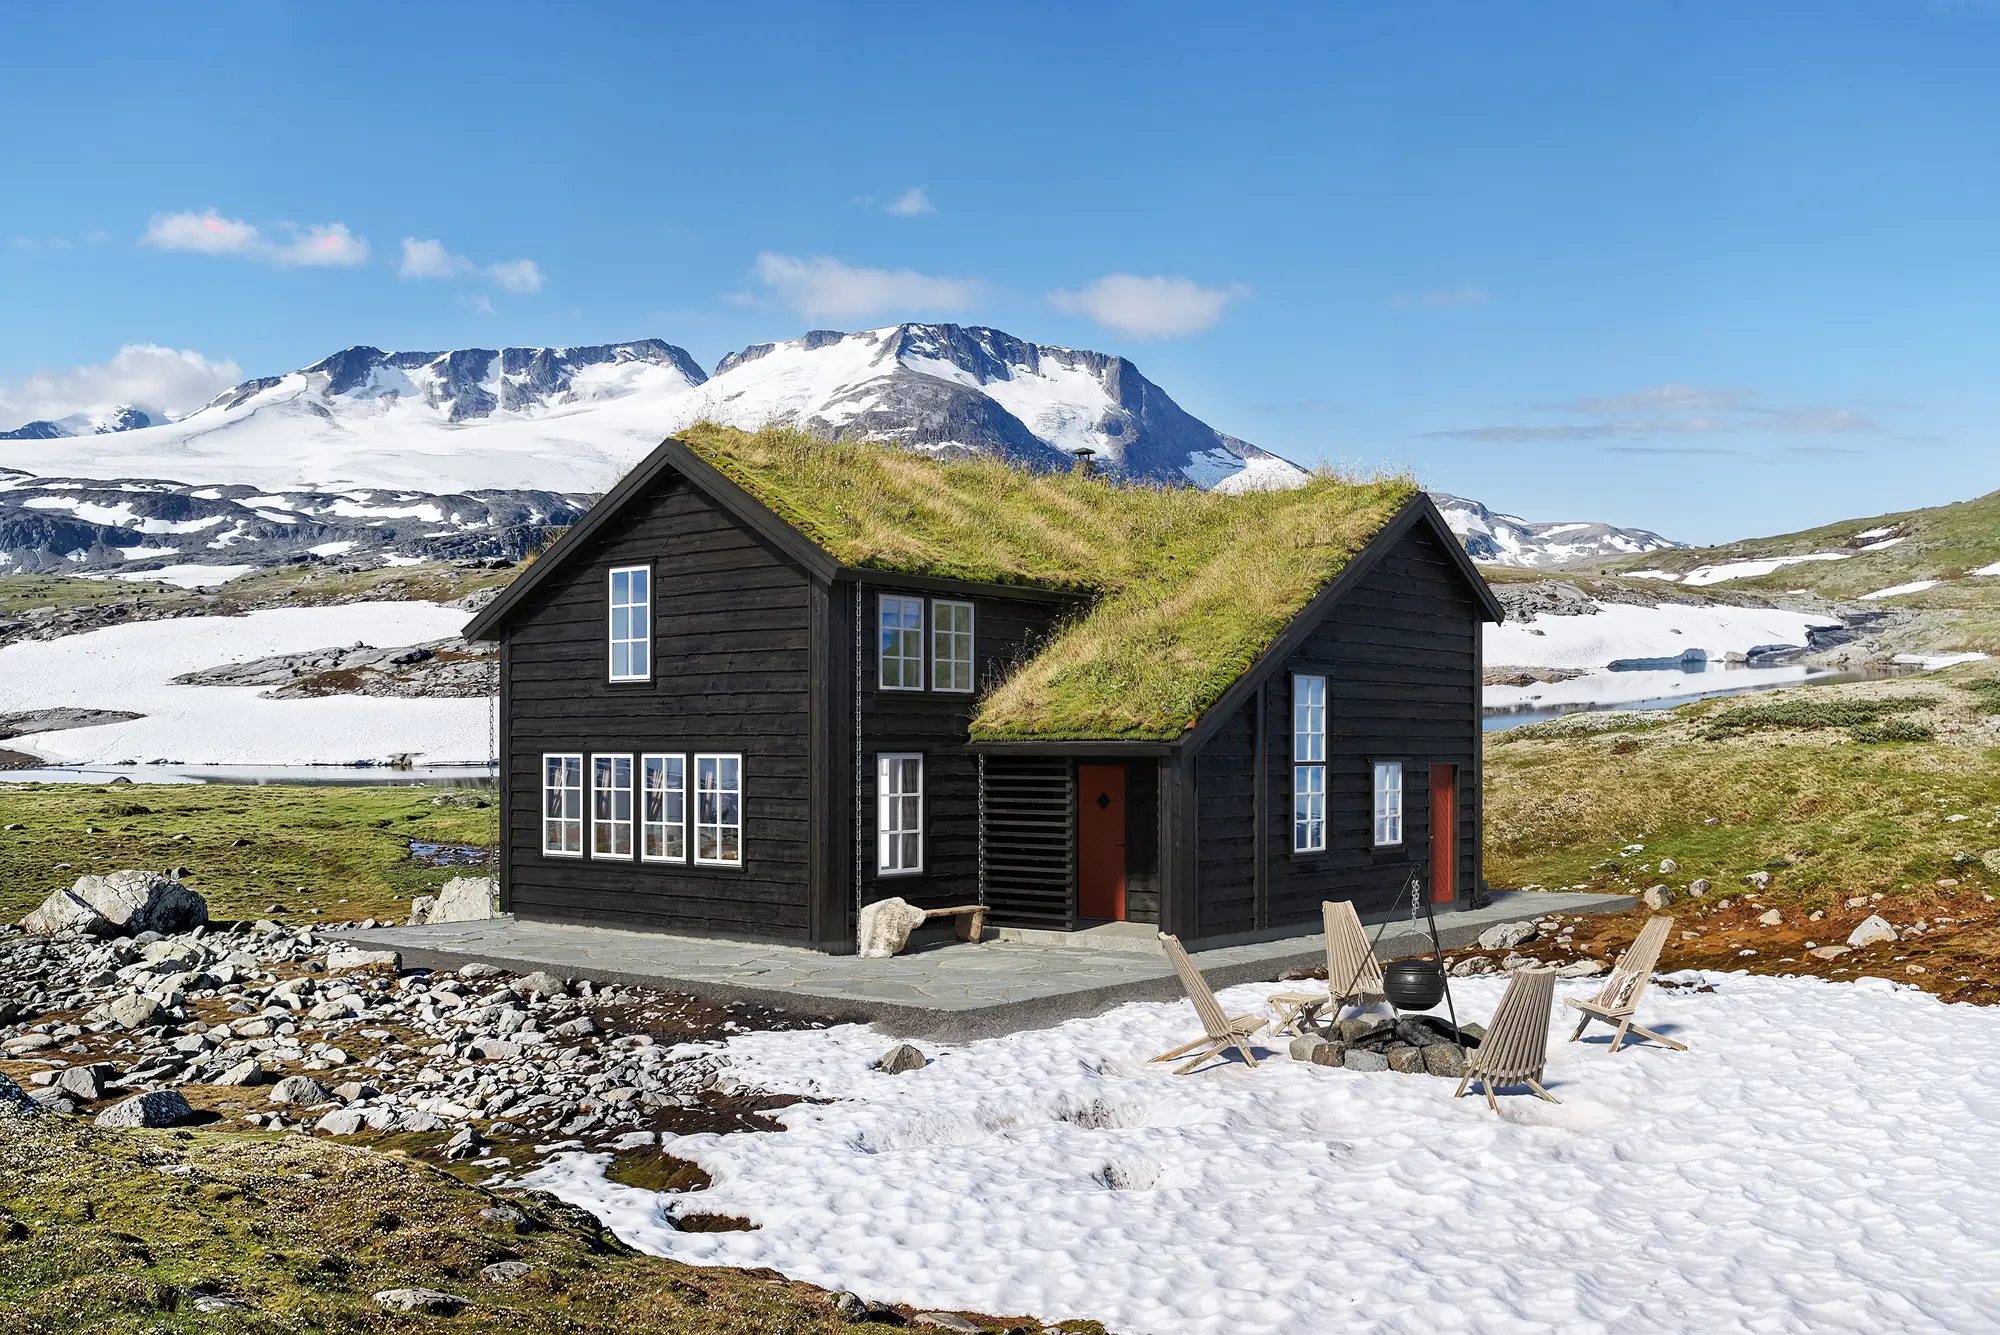
Left: the model of a cabin on moorland in the viewport, with flat colors and simple placeholder surfaces. Right: the finished render of the same cabin, with textured timber, a turf roof and daylight.
A simple lighting setup starts with one HDRI image as the world background. It lights the whole scene from every direction. Then add 1 or 2 extra lights only where they are needed. A camera object frames the shot (Numpad 0 shows its view). The Output tab sets the image resolution. In Cycles, the sample count sets how long the render runs: more samples take longer and remove more noise.
What to learn next
- Low poly scenes: small scenes with few faces are good practice. See low poly vs high poly models.
- Curves: for cables, pipes and paths that follow a line.
- Geometry Nodes: procedural modeling, where a node setup builds the shape.
- Retopology: rebuilding a sculpt with clean quads, needed for game assets. Game models also need LOD versions, which are lower detail copies of the same model.
Common beginner problems in Blender and how to fix them
| Problem | Why it happens | Fix |
|---|---|---|
| Bevel or modifiers look stretched or uneven | The object’s scale is not 1 | In Object Mode press Ctrl+A > Scale |
| Dark patches, or faces that look inside out | Flipped normals | Turn on Overlays > Face Orientation (the back of a face shows red). In Edit Mode press A, then Shift+N (Mesh > Normals > Recalculate Outside) |
| Gaps or shading seams in the mesh | Duplicate vertices on top of each other | In Edit Mode press A, then M > By Distance |
| The model looks faceted | Flat shading | Object > Shade Smooth, or Object > Shade Auto Smooth to keep sharp corners |
| Dents or pinches under Subdivision Surface | Triangles, n-gons or poles in curved areas | Rebuild those areas with quads and add support loops (Ctrl+R) near sharp edges |
| Sculpt brushes do almost nothing on a subdivided sphere | The Subdivision Surface modifier is not applied, so the brush only touches the base mesh | Use Voxel Remesh, or apply the modifier first |
| A seam shows down the middle of a mirrored model | The two halves are not joined | On the Mirror modifier turn on Merge and Clipping |
| You cannot select a vertex or face behind other geometry | Solid view only selects what you can see | Press Alt+Z for X-ray |
| The Numpad view keys are missing on a laptop | The keyboard has no numpad | Edit > Preferences > Input > Emulate Numpad, or use the navigation gizmo |
Exporting a Blender model: FBX, OBJ, glTF and STL
Use File > Export and pick the format. The right format depends on where the model goes.
| Format | Keeps | Use it for |
|---|---|---|
| FBX | Meshes, materials, rigs and animation | Unity, Unreal Engine, and exchange with 3ds Max, Maya and Cinema 4D |
| glTF / GLB | Meshes, materials, textures and animation, in one GLB file. Quads become triangles. | Web viewers, AR and the Godot engine |
| OBJ | Geometry and materials (a separate .mtl file). No rigs, lights, cameras or animation. | Simple model exchange between programs |
| STL | The mesh only, with no color or material | 3D printing |
Run 3 checks before you export:
- Apply transforms: in Object Mode select the object and press Ctrl+A > All Transforms, so scale and rotation are not carried over wrong.
- Check the units in Scene properties > Units. A model built at the wrong scale arrives in another program too big or too small.
- Include the textures. GLB stores them inside the file. For FBX, set Path Mode to Copy in the export options and turn on the Embed Textures button next to it. For OBJ, send the image files next to the .obj and .mtl files.
To change a format without opening Blender, use our free FBX converter, OBJ converter or STL converter.
3D printing from Blender
A printable model must be one closed mesh with no holes, called manifold, with walls thick enough for the printer and material. Set the scene units to millimeters first, so the exported size is the printed size. Install the 3D Print Toolbox from Edit > Preferences > Get Extensions. It checks the mesh for non-manifold edges and thin walls, and its Make Manifold button fixes some of the problems. Then export with File > Export > STL and open the file in the STL converter, which shows the size, the triangle count and whether the mesh is watertight.
Getting a model built by a studio
If a model started in Blender needs finishing, or you need one built from drawings, send 3Dstudio.co what you have. A useful package contains the model exported in a common 3D format, reference images or drawings, a note of which parts are finished and which are missing, and what the model is for (a render, a game, a print). A fixed quote comes back within 30 minutes of receiving the files.
Open-ended 3D modeling work is billed at €85 per hour; see how pricing works. For game teams, models are built to your triangle budget and naming convention and delivered as FBX or glTF with textures, as described on our game art outsourcing page.
Questions about 3D modeling in Blender
Is Blender good for 3D modeling, and still worth learning in 2026?
Yes. Blender is free and open source, and it covers mesh modeling, sculpting, UV unwrapping, materials, rendering and export to game engines. It gets several releases a year, with long term support (LTS) versions, and 5.2 LTS is the current one.
Is 3D modeling in Blender hard for beginners?
The interface and the shortcuts are the hard part of the first sessions, not the modeling ideas. Use the shortcut table above and follow the 10 step stool. Confusing Object Mode with Edit Mode, and forgetting to apply scale, cause most early problems.
How long does it take to learn 3D modeling in Blender?
The basics come first: the stool in this tutorial covers the core workflow of block out, cut, extrude, bevel and render. Clean topology for Subdivision Surface, sculpting and photoreal lighting take longer, because they improve with every model you finish.
Do I need a powerful computer to run Blender?
No, for basic modeling. Blender’s requirements page lists a minimum of a 4 core CPU, 8 GB of RAM and a graphics card with 2 GB of video memory. It recommends 8 cores, 32 GB of RAM and a card with 8 GB of video memory. Sculpting dense meshes and rendering with Cycles are the tasks that need the stronger machine.
Can I sell models and renders I make in Blender?
Yes. Blender’s license page says that what you create with Blender, including images, movie files and .blend files, is your property and free to use as you like, also commercially.
Is Blender good for 3D printing models?
Yes, if the mesh is closed (manifold), the scene units are millimeters and the walls are thick enough for your printer. Use the 3D Print Toolbox extension to check the mesh, export STL, and see the 3D printing section above.
Should I learn EEVEE or Cycles first?
Start with EEVEE. It renders in real time, so you see lighting changes at once. Switch to Cycles when lighting accuracy matters and you can wait longer for each image.